
 Sign In

Kristen’s Tip: Mark & Sew Darts Quickly
Hello everyone! I believe that it’s just about time that I start coming around more.
I am really excited for my first post on Coletterie, and to start sharing a little bit of my day-to-day as Colette Patterns’ Sewing Pattern Developer with you. For my first post, I’ll show you how I quickly mark and sew my darts.
In my college sewing and patternmaking classes we were discouraged from marking our dart legs before sewing. This is the alternative method I picked up; it uses the thread on your sewing machine needle to guide you to the dart tip.
Not only do you spend less time marking and more time sewing, it eliminates stray marking lines on the inside of your finished garment.
Step-by-step
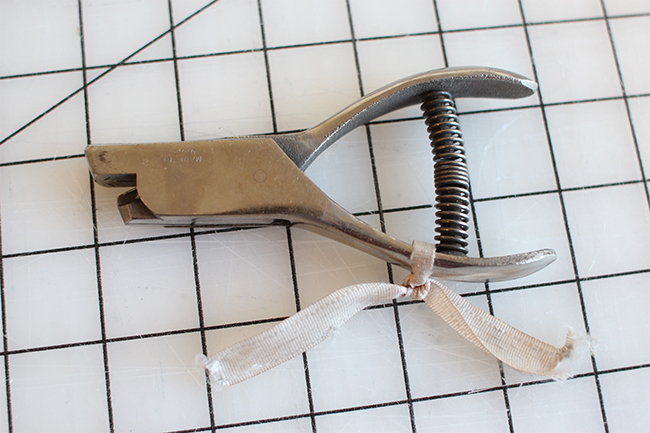
Before we start, I highly recommend acquiring a pattern notcher (you can find them on Amazon.com). This tool will punch a small notch on the edge of your pattern, making it easy to locate where you want to snip your fabric later.

1. Locate the dart legs on your pattern. Using the pattern notcher, punch a notch at the end of each leg.
Tip: If you’re notching tissue paper be sure to keep the tissue pulled taut as you punch it.

If you don’t have a pattern notcher, you can also use a pair of scissors to mark your dart legs. Just make sure you clip within your seam allowance.
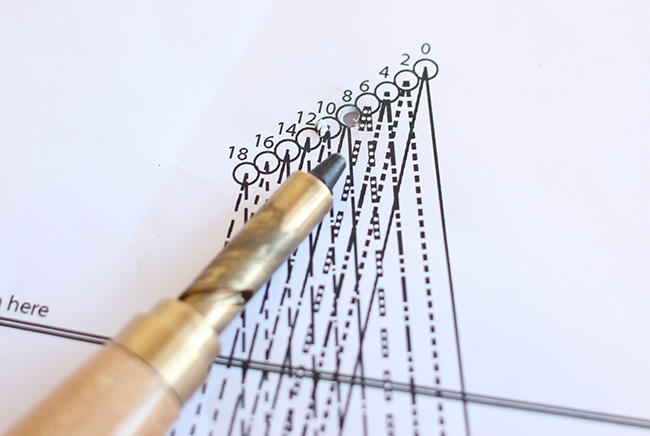
2. Use a screw punch to cut a hole at the dart tip.
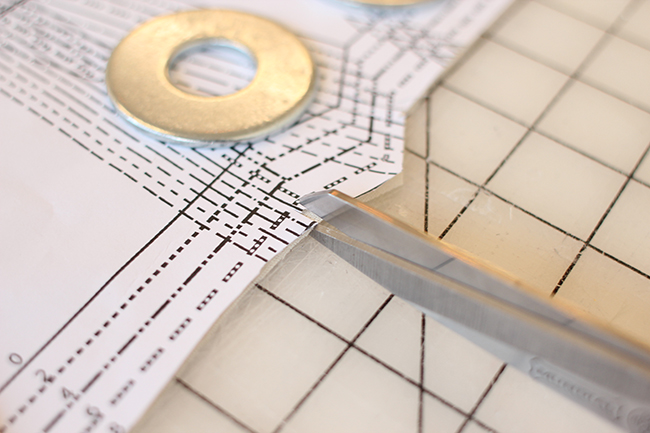
3. Lay the pattern piece on top of your fabric. Begin cutting out your fabric as you normally would. Transfer dart leg markings by snipping the fabric with shears.

4. Mark the dart tip with chalk or pencil.

5. Once your fabric is cut out, pin the dart as you normally would, matching the notches that mark your dart legs.

6. Pull out a few inches of thread from the needle, making sure you have at least as much thread as the length of your dart.
7. Beginning at the edge of the dart leg notch, make a few stitches towards the dart tip, and then backstitch.
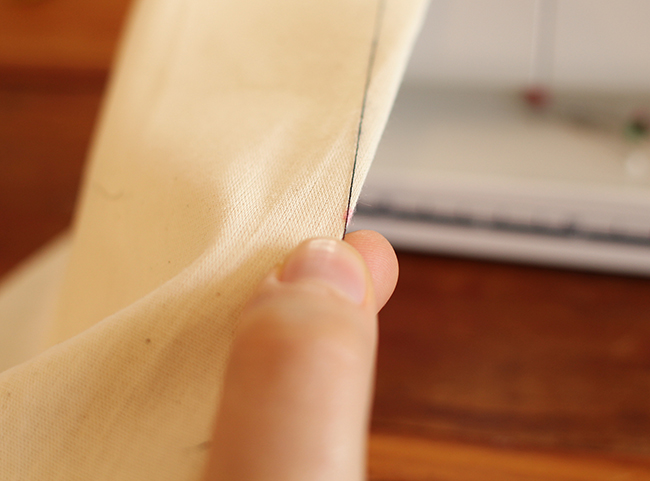
8. Find your needle thread and pull it forward; use your thumb and forefinger to hold the thread in place over the dart tip.
9. Using the thread as your guide stitch toward the dart tip.
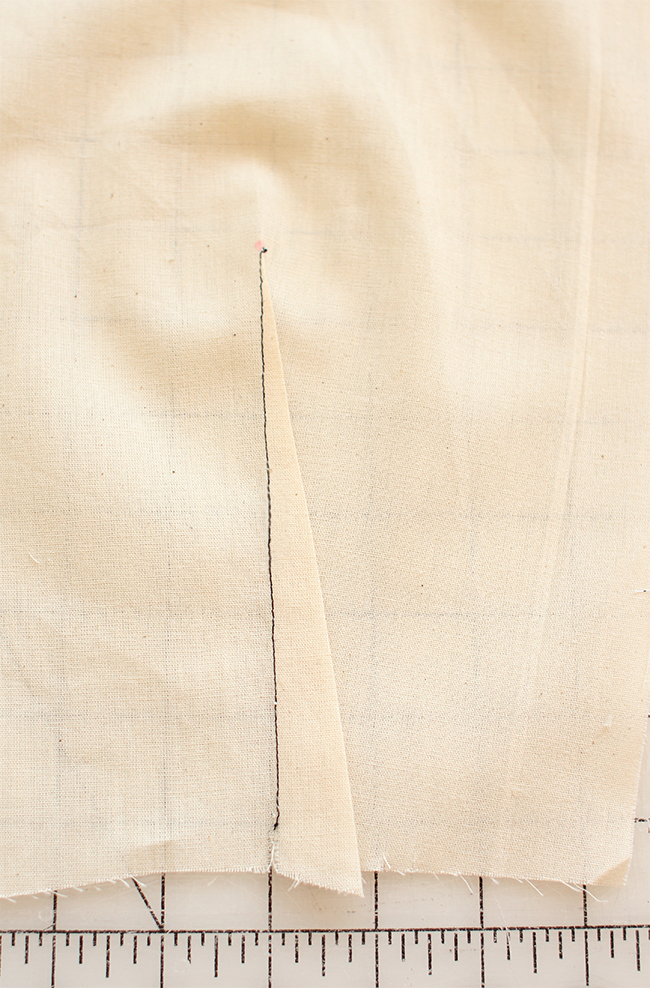
Tie off your thread tails as you usually would, and you’re done! Perfect darts without all that excessive marking.
Comments
Pia
October 22, 2013 #
Very useful tip! Thanks a lot Kristen
francesca
October 22, 2013 #
Excellent tip! And great first post! Can’t wait for more:)
Carla
October 22, 2013 #
Love it!!! Thank you!
Samina
October 22, 2013 #
Brilliant! I love it, thank you so much. You just made my sewing life a bit easier.
cm
October 22, 2013 #
That is and elegant solution – thank you!
Gwen
October 22, 2013 #
whoa! This is happening on my next project! Thank you!
Nikell
October 22, 2013 #
What a great tip!? This will help so much with my next projects. Thanks for sharing (^_^)
sindhoooo
October 22, 2013 #
Wow! Great tip! Thanks a lot!
French Toast Tasha
October 22, 2013 #
Thanks Kristin! I often don’t mark my dart legs, so sometimes the stitching comes out a little wobbly, this seems like a great solution!
Joyce Hamilton
October 22, 2013 #
What a great way to sew darts :) Thanks!
Amanda
October 22, 2013 #
I love this tip! Do you find this to be tricky on slippery fabrics such as silk? I imagine that kind of fabric would slip a lot when it’s not pinned or basted beforehand, but perhaps I’m wrong?
Kristen
October 22, 2013 #
Yes! If I have a super difficult to work with fabric I always prefer to take extra steps such as drawing in darts , pinning, and basting, etc., instead of doing too little prep work and having my stitching come out sloppy.
Derenda
October 22, 2013 #
Thank you so much for this tip. I have always had trouble with darts and this is a wonderful solution.
Gillian
October 22, 2013 #
This is brilliant. I can’t wait to try it.
Diane @ Vintage Zest
October 22, 2013 #
I heard this described once before and attempted to do it without success. This looks much different than what I was doing, so thanks for the step-by-step photos!
As long as you’re being so helpful, do you know of any resources of how to add sequin or beaded appliques that have been mounted on mesh? I bought some with the intention of using them on a garment, and I’m not quite sure where to sew/cut/etc. Thanks!
andrea
October 22, 2013 #
Great tip, will try it next time – thanks.
Samantha
October 23, 2013 #
Holy cow, I’m a couple of days behind on my reading, but this is worth going back for! THANK YOU!
Maddie
October 23, 2013 #
This is the best tip ever! Haven’t heard of this one before. Thanks!
Melissa S.
October 24, 2013 #
This is amazing! My mind is blown. I will be doing this from now on. You have made my day, for sure!
Paméla
October 25, 2013 #
Thank you for that tip! I can’t wait to try it!!
Nadia Lewis
October 25, 2013 #
Great tip!
Beth
October 26, 2013 #
I have a punch just like that. The box is labeled McBee punch and is apparently for an old kind of catalogue system. Now I have a way to actually use this punch. :)
Sara
October 27, 2013 #
Mind.Blown.
Thank you.
Magali
October 28, 2013 #
aWESOME!!L thank you a million times!