
 Sign In

How to make a rouleau pocket
Everyone loves pockets! They make otherwise simple garments super cute and provide a cozy spot for your hands to rest. This tutorial manipulates rouleau strips into any design you can dream up.
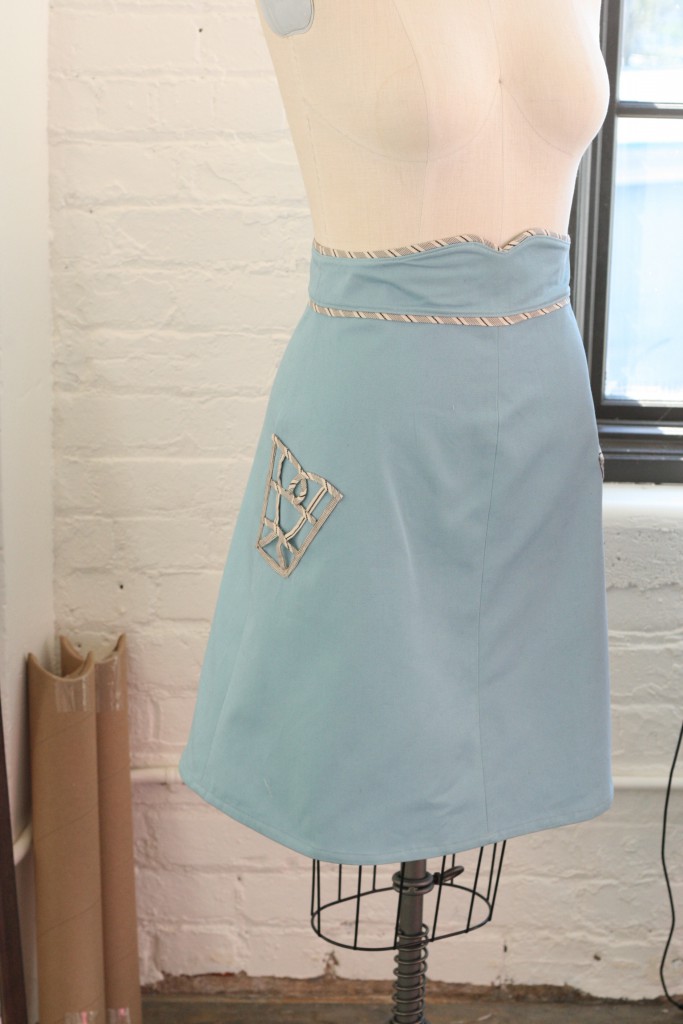
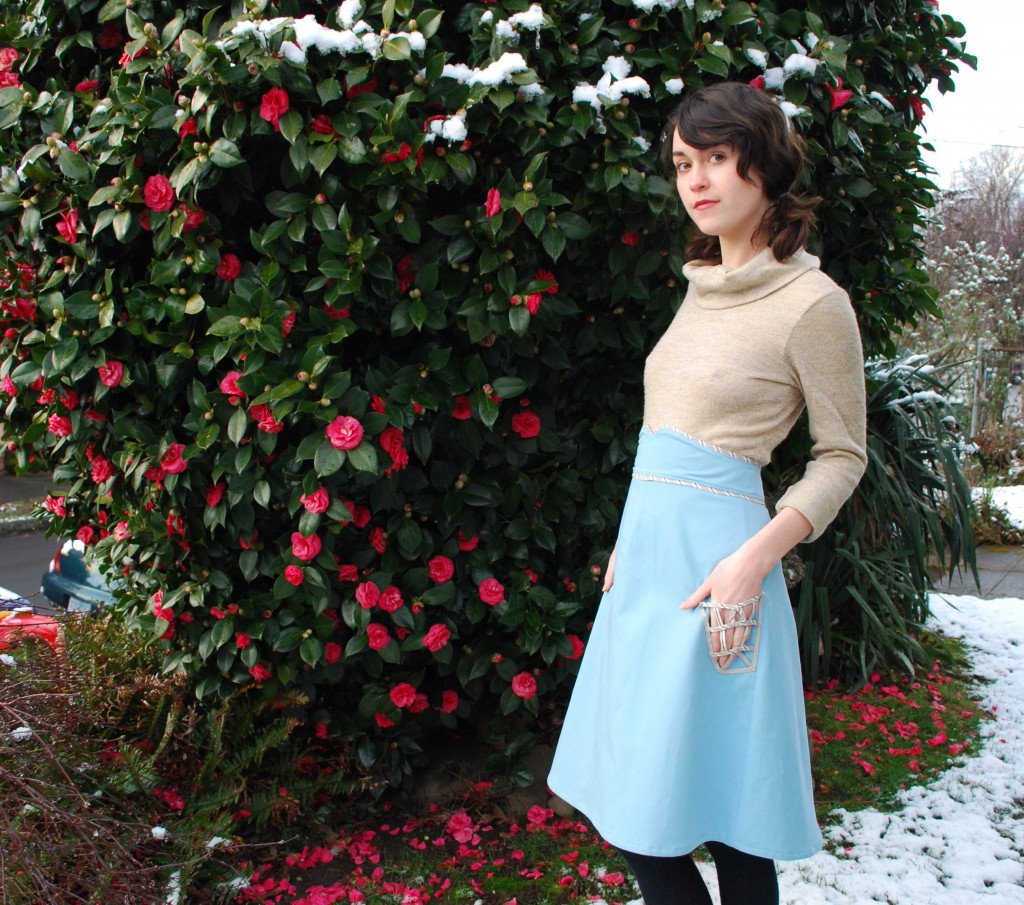
Here we’ve added a rouleau pocket to our ginger skirt.
While these pockets are only semi-functional (you might lose small objects), they sure are pretty and fun to make. Feel free to make them big or small, and as intricate or plain as you like. If you’re set on having pockets that will hold things, just sew the finished pockets onto a mesh or sheer fabric first, then sew onto the skirt.
You will need:
- 1″ strips of fabric (See Step 2 for specifics)
- bias tape maker
- paper
- pencil
- ruler
- pins
- hand sewing needle
- thread
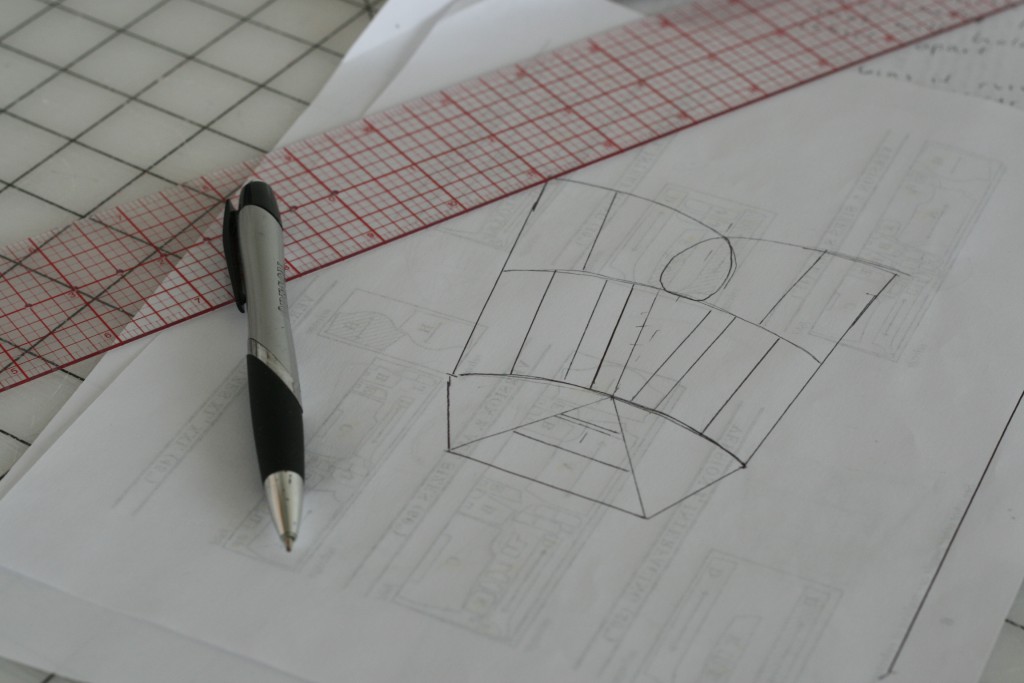
Step 1: Sketch a pocket design on a sheet of backing paper. Backing paper should be fairly lightweight and easy to poke pins through. Use a lighter paper such as tissue paper or tracing paper for more delicate fabrics; I used a regular sheet of printer paper for medium weight cotton fabric. I made my design 4″ by 5 1/2″. If you want to be able to fit your hand in it, measure your hand first and aim for those measurements!
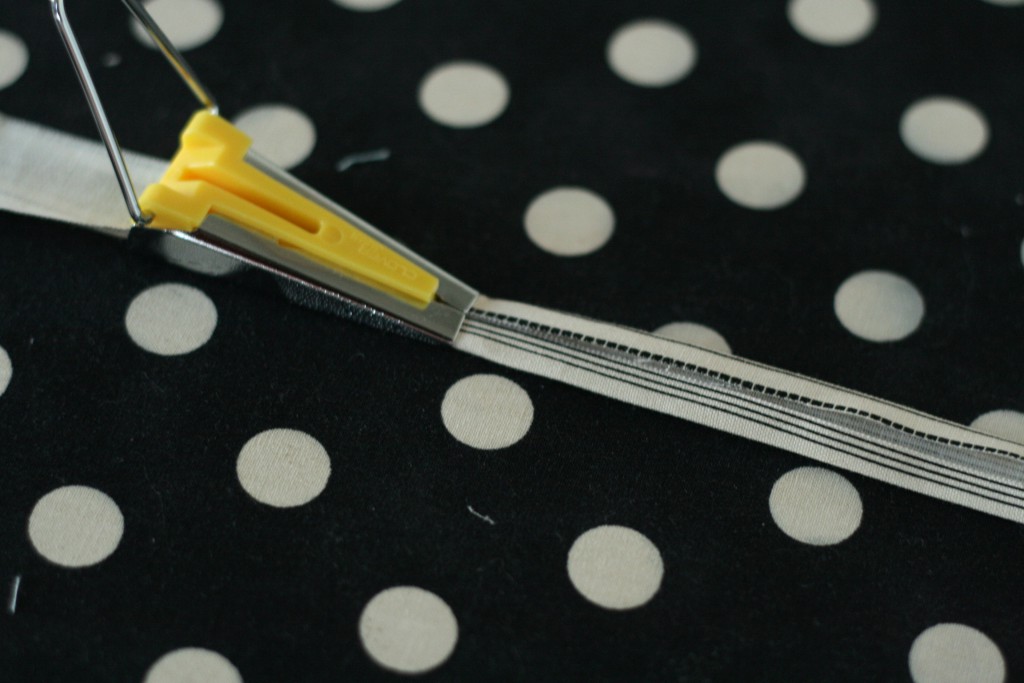
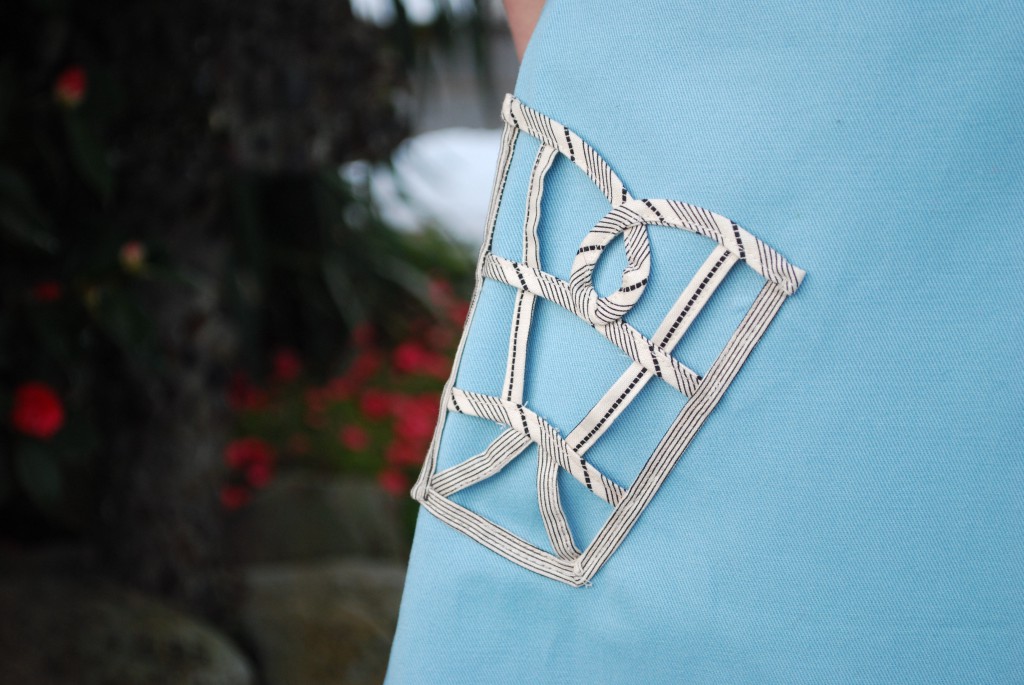
Step 2: Now you’ll need to make fabric strips to create the lattice work of the pockets. I used strips cut on the grain for straight lines in my pocket, and strips cut on the bias for loops and curved lines. Not only was this more functional, but it gave a cute contrasting pattern to the different strips. To make straight strips, just cut a 1″ strip on the grainline. For bias cut strips, see our continuous bias tape tutorial HERE. Either way, run fabric strips through bias tape maker, pressing flat as it emerges.

Step 3: Press bias strip in half so all raw edges are enclosed. Edgestitch. If your strip gets stuck, pull thread tails to guide it over the feed dogs.
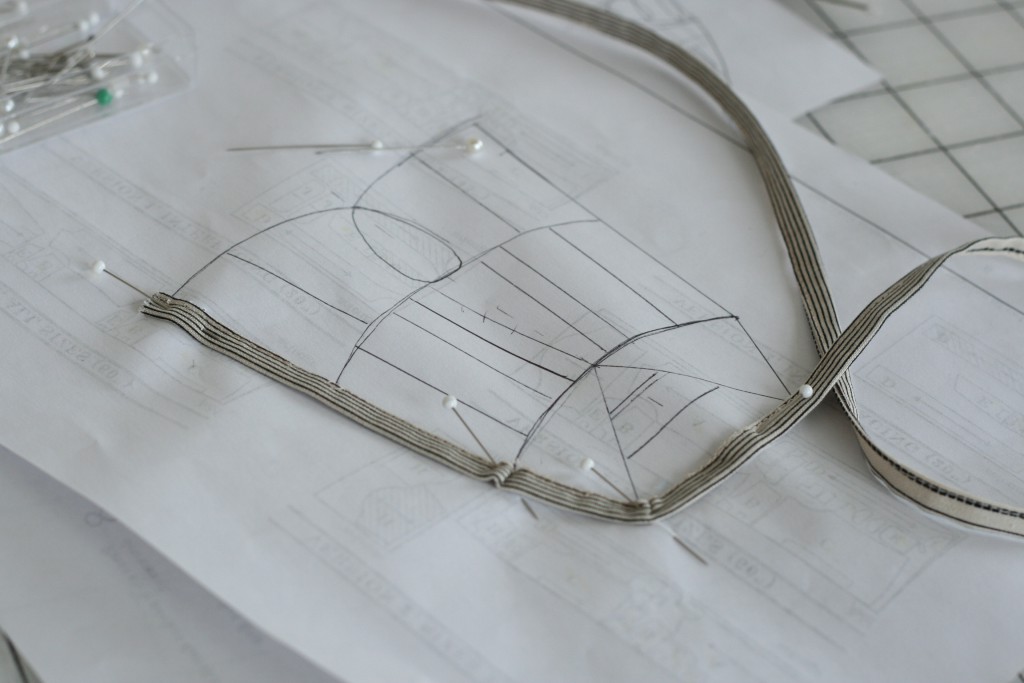
Step 4: Pin strips onto the paper using your design as a guide. It’s okay to deviate from the design a little bit if it looks better, just remember that you’ll need to make two pockets so note the changes you make on the paper.
Step 5: Build up your design by layering strips. Make sure raw edges are hidden by outer strips…this ensures a neat appearance and provides an unseen place to sew the strips together.
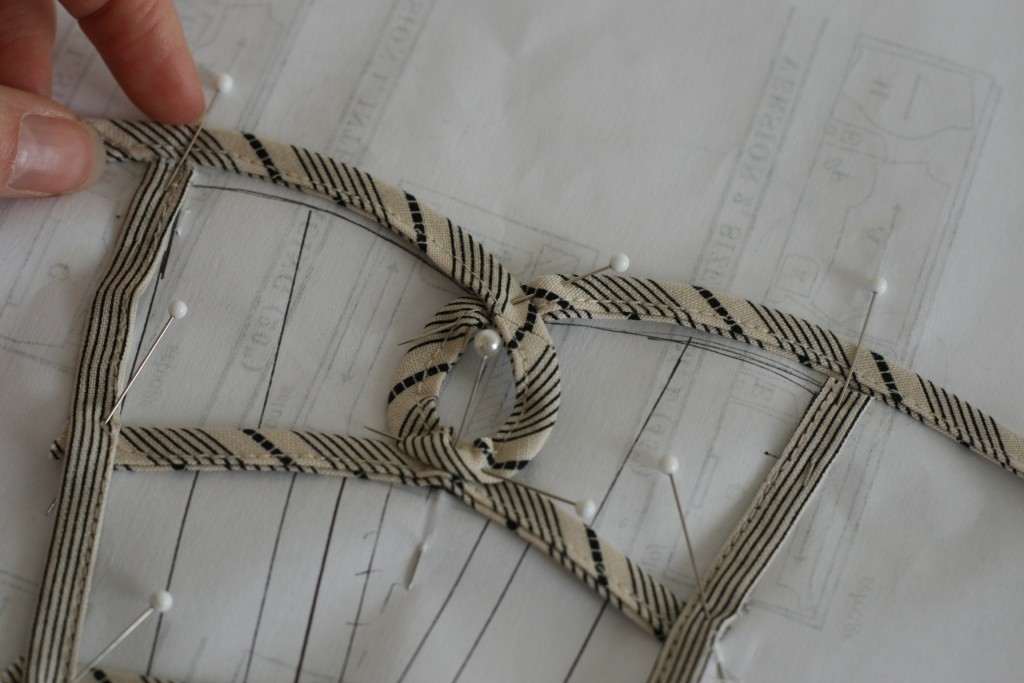
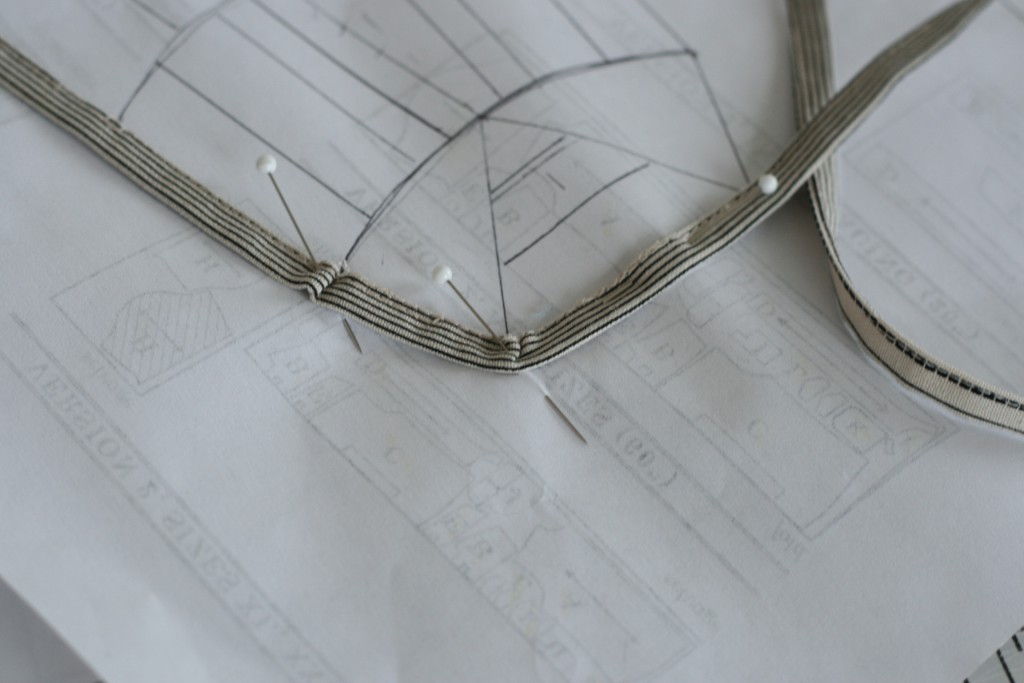
Step 6: To create a loop, place bias strip on design to gauge the appropriate size and then press loop so edges are flat.
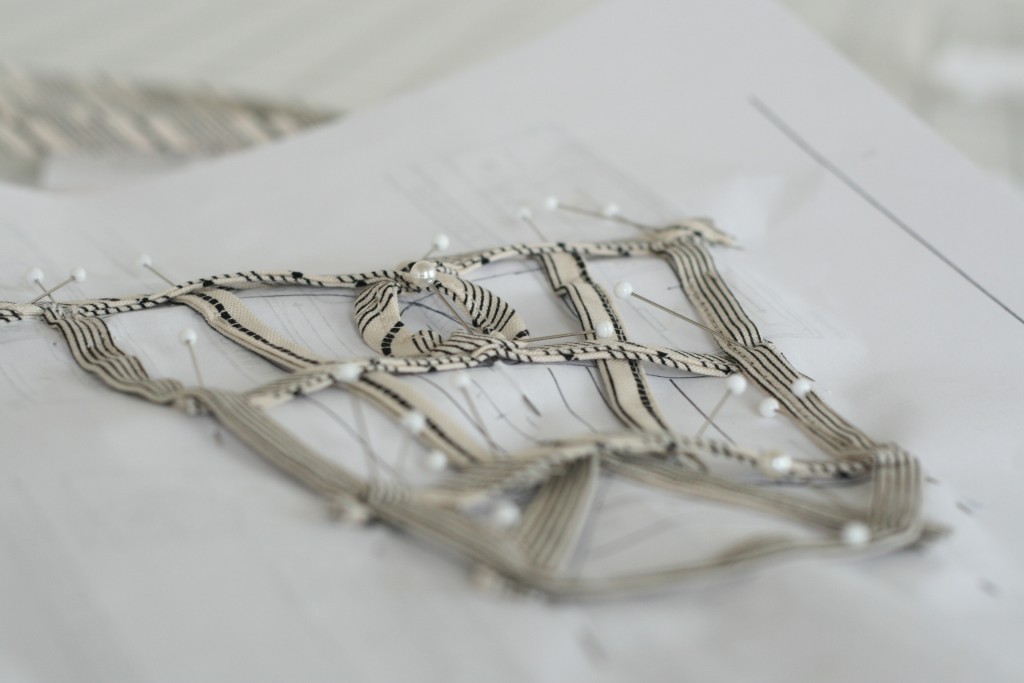
Step 7: The strips will be held onto the paper by pins galore! You can see that my final design was much more simple than my original sketch…it just looked and fit better.
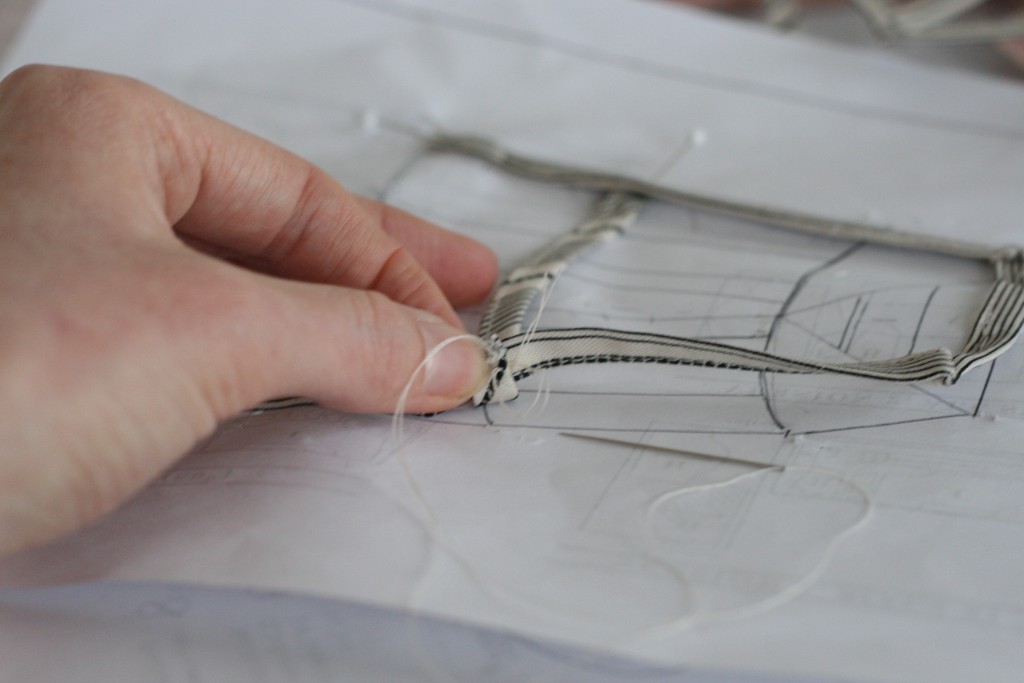
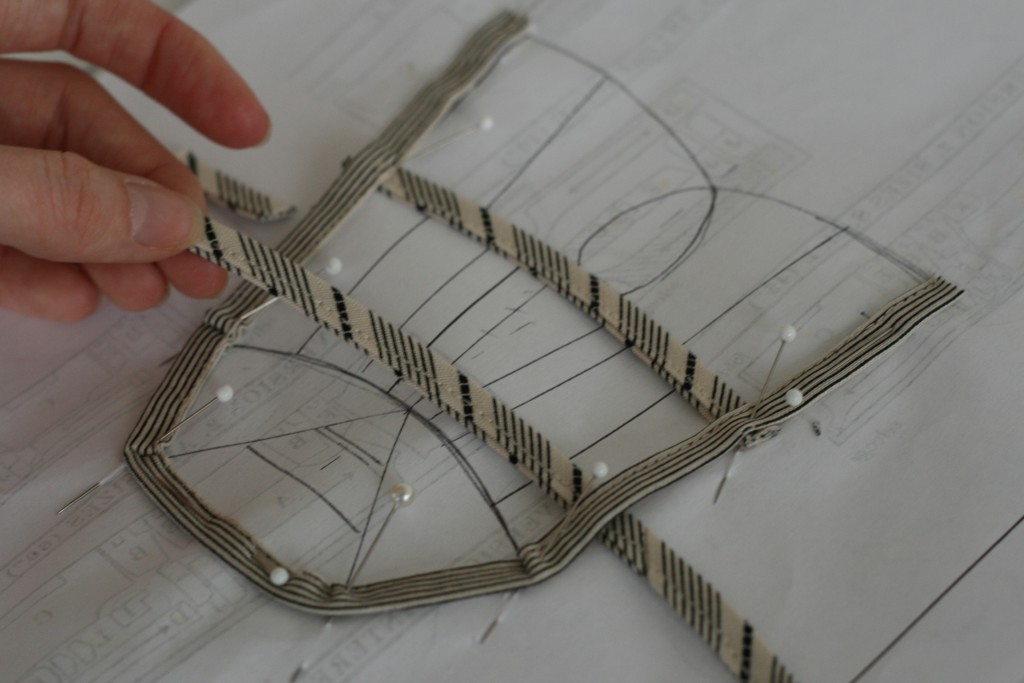
Step 8: Hand sew the strips in place one at a time while it is attached to the paper. Start by sewing the outer structure together, removing pins as you go along.
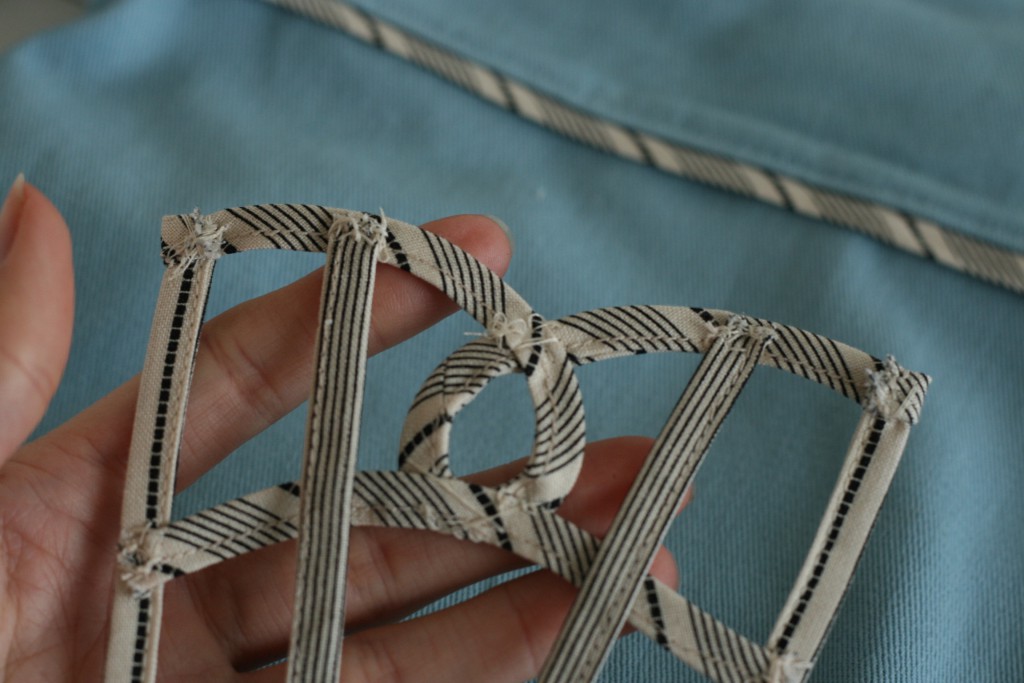
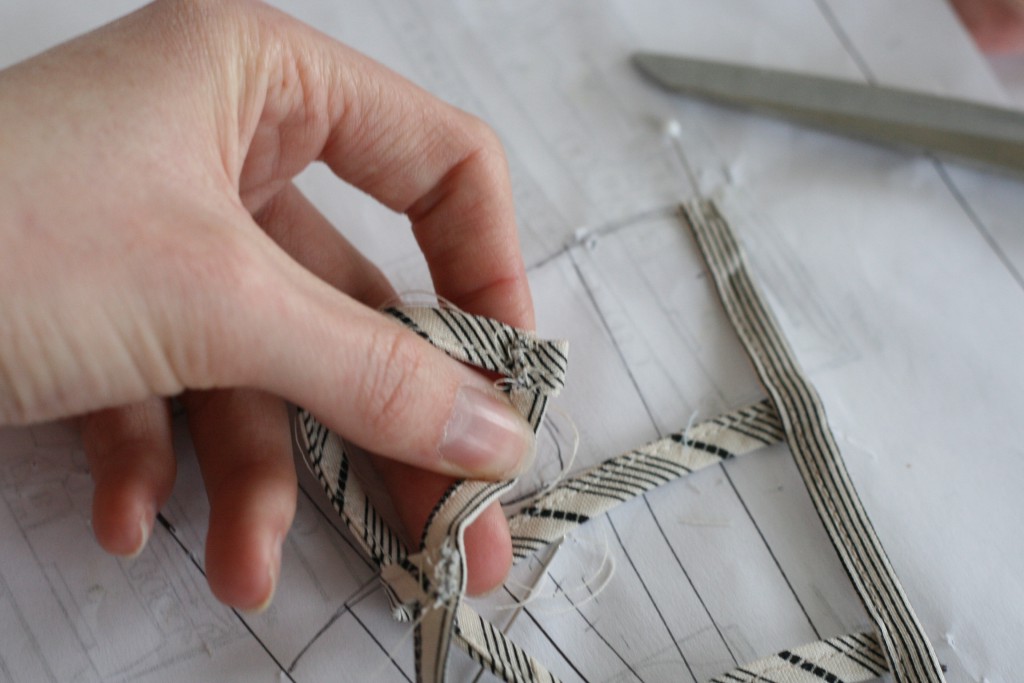
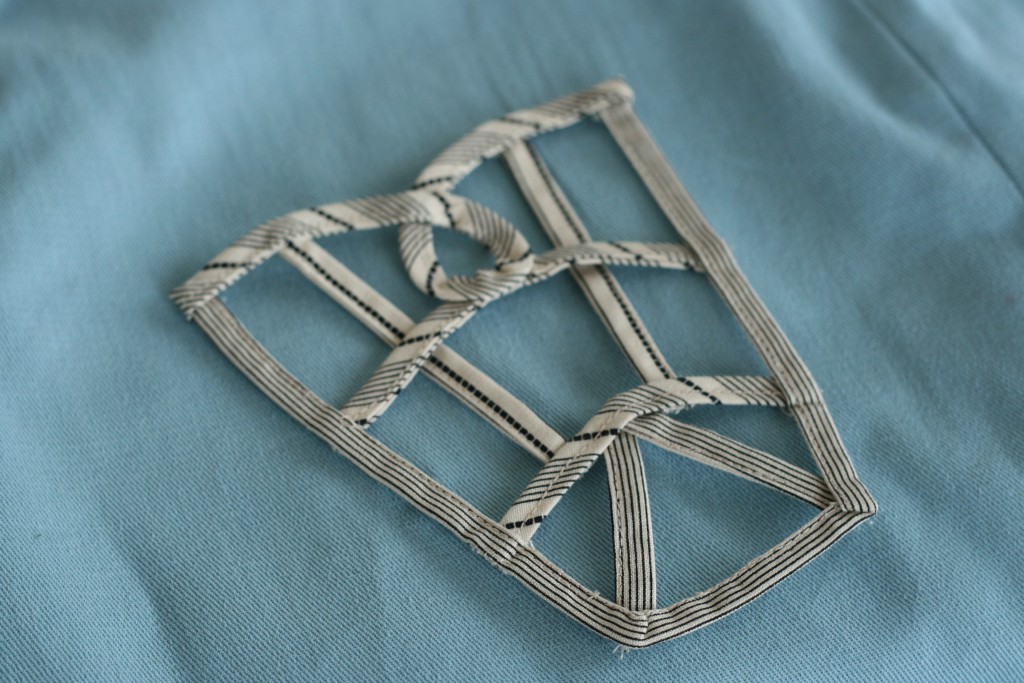
Step 9: Look at that pretty pocket, all sewn together and secure! Now, make a second one (trust me, it’ll go much faster than the first one!)
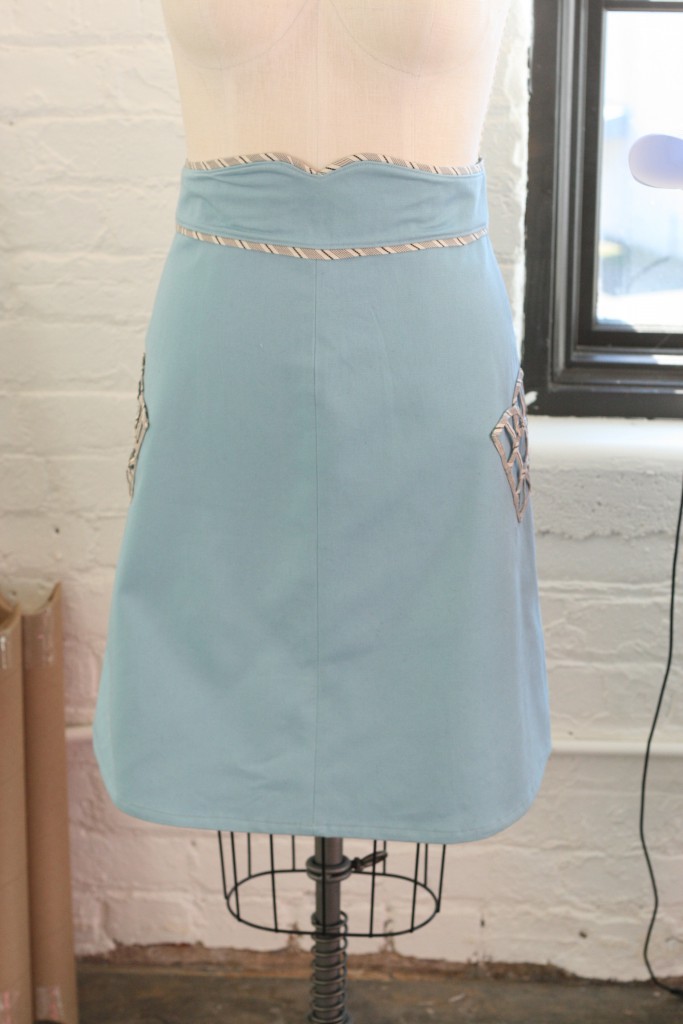
Step 10: After both pockets are finished, determine where on the skirt you want them to be and pin them in place. I like mine at arms length, touching the side seams and dipping forward a bit.
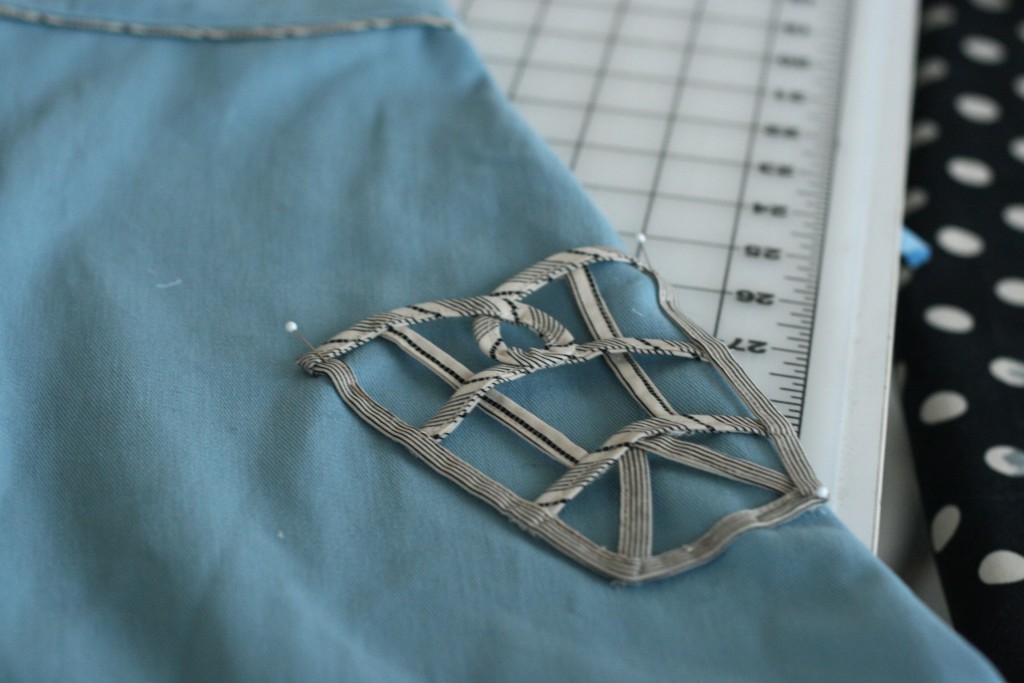
Step 11: Edgestitch along the outer edges of the pocket by machine or by hand. Make sure not to sew the top shut!
Ta-da! Can’t wait to see what you create. Upload photos of your completed projects to our flickr pool or post them in the forum.
Related posts you might be interested in:
- Detail Inspiration: Rouleau: Get inspired by vintage details using this age old design technique!
- Detail Inspiration: Piping: Make those design lines really stand out with some fun piping.
Comments
Amber
July 13, 2011 #
Although very innovative, these pockets are tilted the wrong way-how are your hands meant to fit into them?
Sarai
July 13, 2011 #
Amber, they’re mainly decorative. If you wanted to make them more useful, you could line them (as Rachel mentions above) and place them any way you want.
Susan
July 13, 2011 #
Wow — way beyond my skill level at this point. But I love the look and the possibilities are endless!
Emma
July 13, 2011 #
I do love pockets- such a fun little detail to tie the skirt together! I think I’ll back them though to make them more functional when I try it out. Looks like it might take, at least, a little but of patience!
Sarai
July 14, 2011 #
Yes, it does take a while!
One fabric I like for a sheer backing is silk gazar. It’s nice and stiff, sheer, and stronger than organza. A bit harder to find though!
mahaila
July 13, 2011 #
Thanks for this tutorial. I am definitely going to give this a go. I think that it would set any simple garment off. Thanks again for sharing.
laura
July 14, 2011 #
what a lovely idea – looks like a little bird cage. (: so cute, and such a nice tutorial.
this inspired me to try a “lattice pocket” at some point…
Sarai
July 14, 2011 #
It does look like a little bird cage! I bet old bird cages would probably provide some inspiration for making similar applique.
Mary Anne Flesch
July 15, 2011 #
Great idea, and extremely attractive – these could easily be made totally functional by backing it with the skirt material!