
 Sign In

Behind the Seams: Construction Details from Adored Vintage
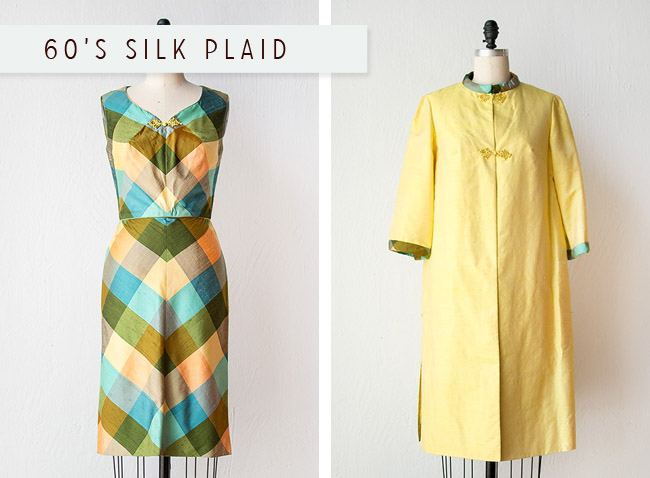
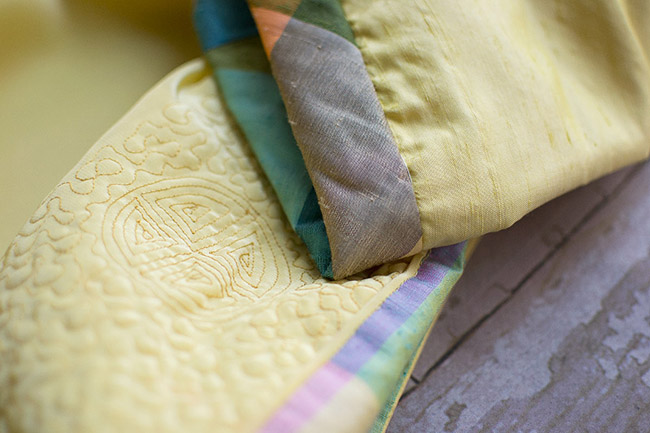
This ’60s plaid silk dress and matching yellow coat are brought to us this month by the fabulous Rodellee Bas, founder of Adored Vintage out of Long Beach, CA.
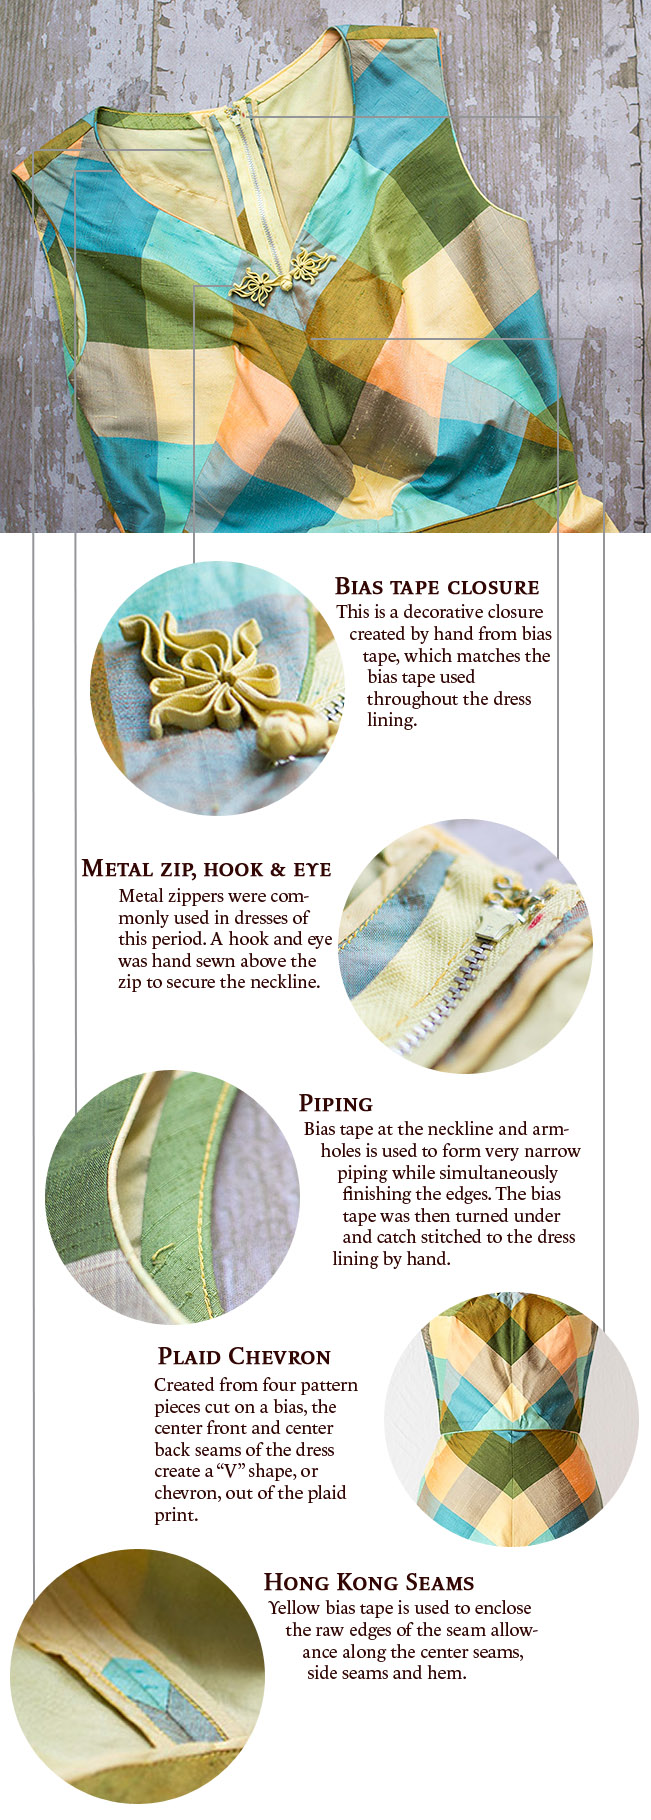
Dress Details

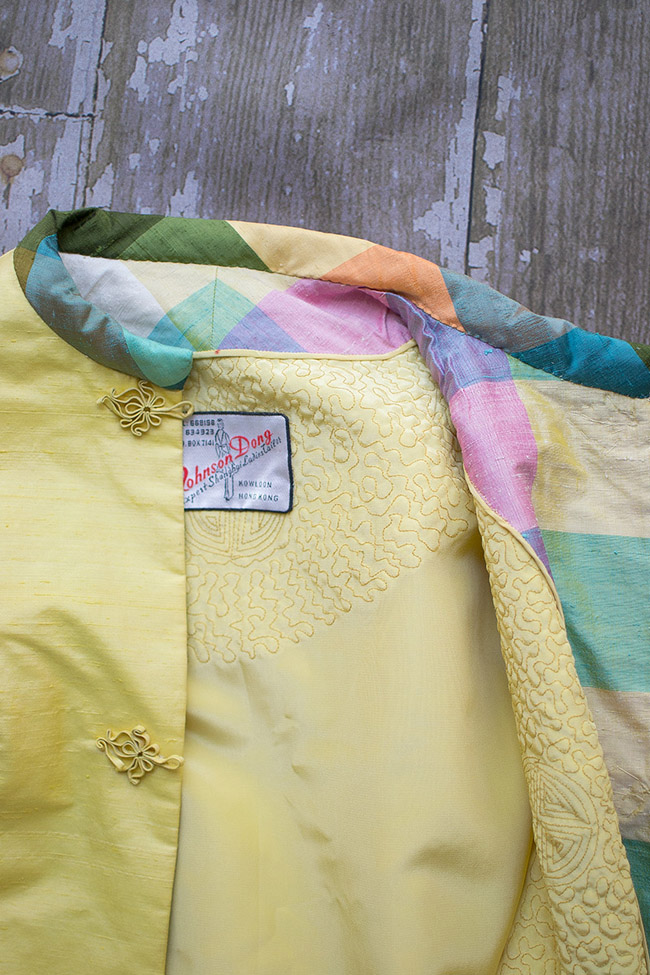
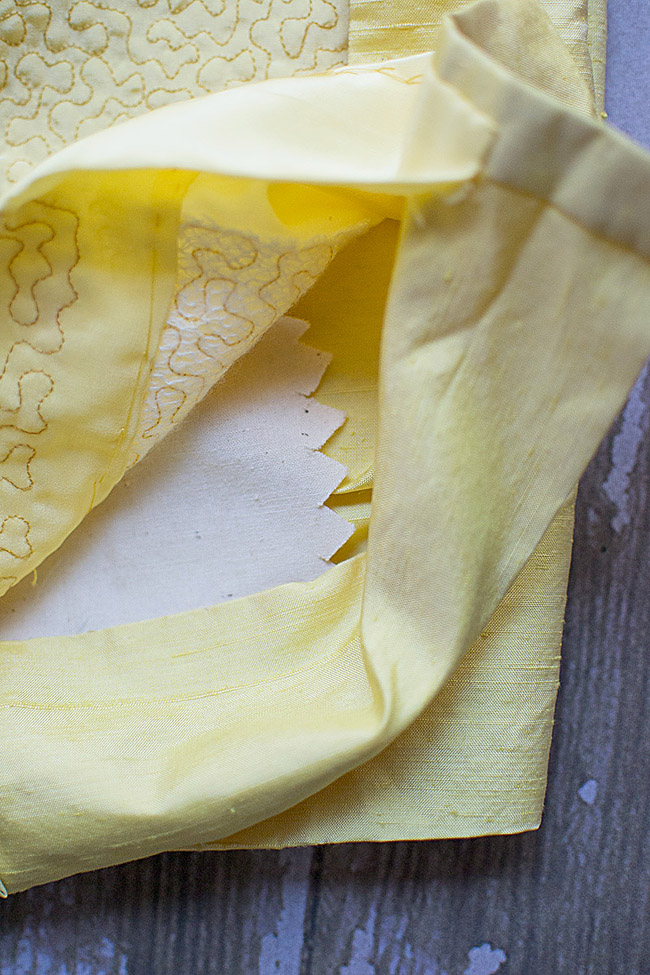
Coat Details

Comments
PendleStitches
August 28, 2013 #
I love this new layout. And what a beautiful dress and jacket.
Erin Hill
August 28, 2013 #
wow, that is just wow, would love to make or have that
Lisa G.
August 28, 2013 #
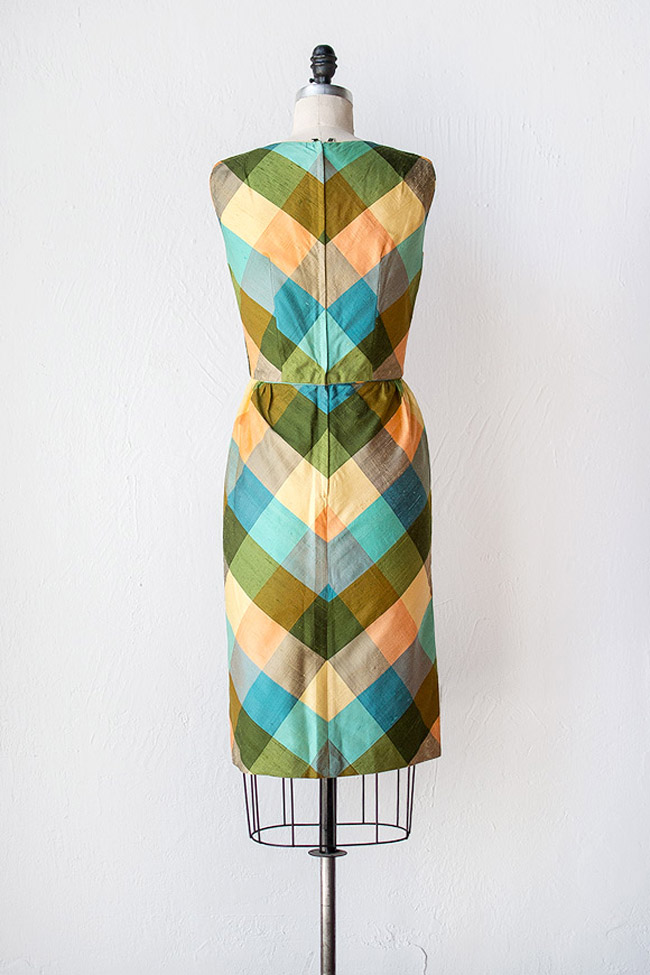
Those pieces are fabulous. The matching of the plaids on the dress is perfect!
Anna | Mormor hade stil
August 28, 2013 #
Wow. I love looking at details like this. The matching of the plaids is exquisite. But my favourite is the quilted lining on the jacket.
laura
August 28, 2013 #
i love this series!!! it’s always fascinating to look at these pieces from the inside out – it definitely make me appreciate the details.
Ginger
August 28, 2013 #
Ack, that dress! It’s so perfect! I love it! What thoughtful details!
Krista
August 28, 2013 #
The details are beautiful–the dress must have felt fabulous to wear.
But….metal zippers??? Yikes, that just makes me cringe! I appreciate the new advances in technology that give us something softer and just as durable!
Ann
August 28, 2013 #
I love your behind the seams posts.
This brings back my Home Ec teacher’s voice: “your garment should be as beautiful on the inside as on the outside.”
This garment is lovely inside and out!
Clare
August 28, 2013 #
Fur-reaking amazing!
Melanie
August 28, 2013 #
Perfectly Chevroned plaid silk, piping, hong kong seams, hand made frog closures, I almost want to throw up with how beautiful this is. Did I mention the PIPING? And the PERFECT chevrons? OMG.
Please make a huge coffee table book of this series, I would pay good money to have these construction photographs on glossy pages at my fingertips…
Rachel
August 28, 2013 #
Hmmm, that is a good thought ;)
kathy
August 28, 2013 #
“A WORK OF ART”
Ayana
August 28, 2013 #
Thank you for sharing this–I feel like I learn a lot about garment construction from this series!
erin
August 28, 2013 #
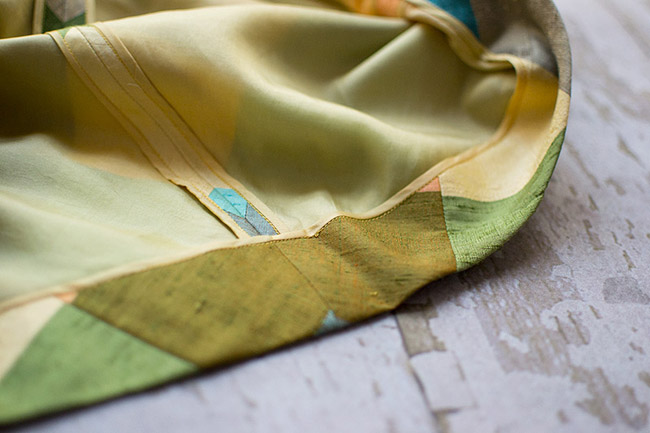
Loved the peek inside the dress, the construction is soooo neat and exquisite! Loved the hong kong seams and all the invisible hand sewing.
Lianne
August 28, 2013 #
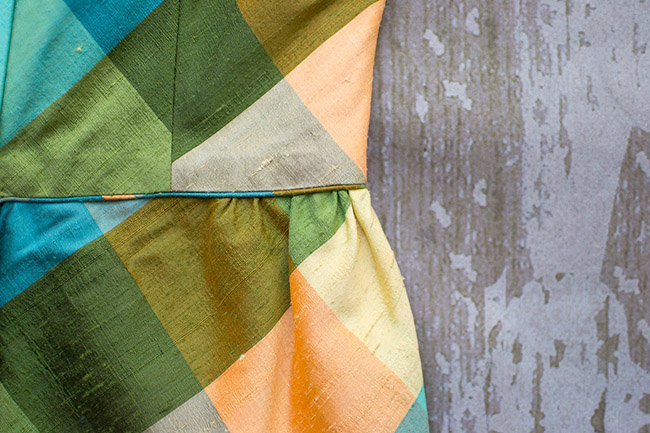
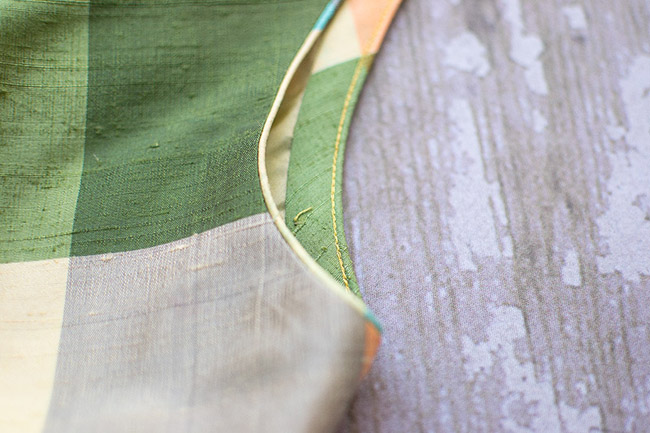
I love Melanie’s idea of the coffee table book. This particular one is my favorite so far. I wish I understood the bias facing/piping at the armholes a little better….is it a flat piping, more like an edging, with no cord inside? The one at the waist definitely looks like it has cord in it….
Kristen
August 29, 2013 #
I was trying to figure out the armhole thing, too. I’m guessing that there’s a very narrow cord in there, because I can’t think of a way to create that detail so evenly without it. My guess is that the binding is sewn on right sides together, then the cord is placed just outside the seamline and the binding wrapped over it. Then it’s understitched so the cording is secured between the seam allowances and the binding without showing any stitching on the outside of the garment. I suppose you could do all of that without the cord, but it would be much more difficult to keep it even, especially on a curved edge like that. I guess you could also pull the cord out afterwards if you wanted it to be flat.
Rachel
August 29, 2013 #
The seamstress made yellow bias tape and corded piping. Then she pinned the piping to the right side of the main fabric, and layered the bias tape on top of the piping. The three layers were sewn together, then the bias binding was turned to the inside and handsewn to the lining.
This is the the standard method for inserting piping between two layers, it is just a bit unusual that the inner layer is bias binding rather than the fabric lining. Hope that helps!
Agneta
September 2, 2013 #
This being a garment from Hong Kong, and me just undertaken an introduction course in making the chinese dress Qipao or Cheungsam (as called in HK), I don’t think it’s piping, it might in that case just be the bias binding overfolding all the layers of fabric creating what feels like piping, but you have to cut it down to the exact right measurement – otherwise it will lay feeling “empty”.
I just love the handmade closure! (this being the most “easy” of the chinese closures to make by hand :o )
Really a work of art. Pure love. :)
Rachel
September 3, 2013 #
The dress isn’t from Hong Kong, the seamstress simply used the Hong Kong finishing technique for the seam allowances.
The piping is as I explained it above.
Patricia
September 4, 2013 #
But the coat tag says Johnson Dong, Kowloon Hongkong. Where was the garment made if not in HK?
Rachel
September 4, 2013 #
Oh gosh, you’re right that it says Hong Kong on it. I tried searching for info on the company but that name… didn’t really give the most appropriate search results. Ha!
Carolyn
August 29, 2013 #
It’s a bit funny this was posted so recently. I too love the piping/bias binding combo and know where you can find a TUTORIAL for it! It’s on Casey’s Elegant Musings blog. However, it’s from a couple years ago. The reason it’s funny this was posted now is because I just linked to the tutorial in my latest blog post. So, without really intending self-promotion here, if you go here:
http://themodernmantuamaker.wordpress.com/2013/08/29/last-years-cambie-dress/
in the middle of the post is a link to Casey’s tutorial for this very technique. Now that I’ve been reminded about it twice in one week, I think this is seriously a sign I need to try it out for myself!
Rachel
August 30, 2013 #
Oh perfect, Casey’s Tutorial is exactly how this would have been done. Thanks for sharing!
Jenny
August 29, 2013 #
This is a truly beautiful dress! The plaid matching/ chevron effect is so perfect, but I think my favourite detail is the piping finish on the arms & neckline. I’ll definitely make a mental note of that one :)
El
August 29, 2013 #
This dress is stunning. I never finish out the inside of my clothing to this extent, but this really makes me tempted to do it. I love the idea of a coffee table book. I would totally buy it. It would inspire me to make better garments.
dani
August 29, 2013 #
stunning…what craftsmanship…
LeeAnn
August 29, 2013 #
This is one of the most beautiful vintage dresses I have ever seen. And a coordinating coat?! Now I want to find a silk just like that.
Deanna
August 29, 2013 #
This is so lovely. I especially like the thought of a dress with a matching coat. How cool is that?
Also, a definite thumbs up on the coffee table book!
Ellen
August 29, 2013 #
Beautiful. A wonderful experience taking-in the details on these garments: piping, quilted lining, & hand-made closures. Oh, definitely, a coffee table book…
Angela.
August 29, 2013 #
Wow… just lovely, and some strong incentive to up my game and not just “get things done”
Seattlerain
August 29, 2013 #
Runs to search patterns in stash and fabric online to match. . .
Jodi
August 29, 2013 #
Wow – truely amazing sewing skills shown here. I’m sure who ever made it would be proud to know there are still people who appreciate fine craftmanship.
Thanks for sharing!
Mary
August 30, 2013 #
This garment is just stunning and I thamk you for posting such excellent photos to clearly see the construction details. Many thanks to all who commented with additional resources.
Catherine
August 31, 2013 #
oh god thats so beautiful! I love looking at the tiny details on dresses – they require so much effort to be done properly and neatly and they should be appreciated!
ronda halvorsen
September 3, 2013 #
How classic nouveau!
DAI TE WIATA
September 4, 2013 #
Thank you for this post I love love love this outfit and aspire to be able to produce garments of a similar quality (pipe dream i am afraid). Please keep these type of posts coming.