
 Sign In

Adjusting Parfait for a small bust: a tutorial from Gertie!
I am very excited about this. I’ve received several emails asking how certain patterns, but especially Parfait can be adjusted for a smallish bust measurement. Well, I’m pleased to announce that the beautiful and talented Gertie has written a wonderful tutorial on doing a small bust adjustment and has graciously allowed me to repost it here for you all.
Here’s the instructions from Gertie:
Here’s what you need:
- a colored pen or pencil
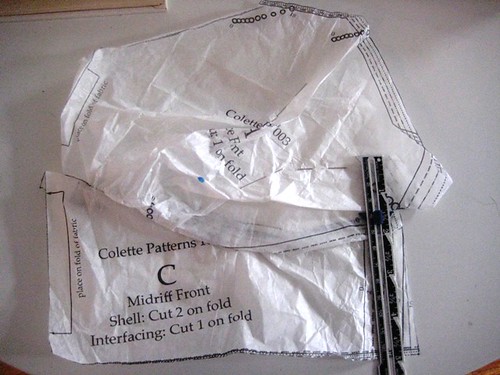
- two pattern pieces: the front bodice and the front midriff
- pins
- tape
- paper
- seam gauge or clear ruler
In a nutshell, what you have to do is try on the pattern tissue, pinch out bust fullness, and then transfer those changes on the flat pattern. Make any sense?
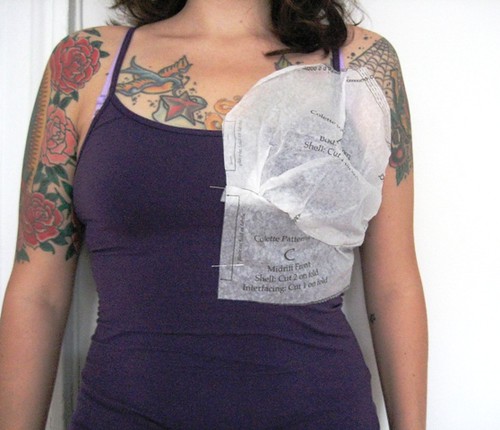
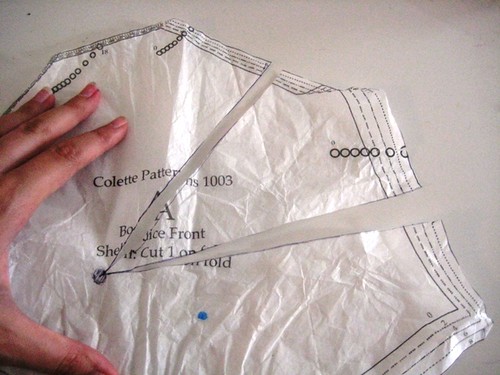
To start, we’re going to do a tissue fitting of the front bodice. At the seam allowances, pin together the front bodice pattern piece and the midriff piece. Very important: for the fitting, wear the bra that you plan to wear while wearing the dress. Also layer on top a very snug camisole or slip that so you can pin the pattern to you.
Pin the pattern piece to your camisole at center front, the side seam, and the top of the bodice, where the strap tab will connect. Don’t forget to account for the 5/8″ seam allowance.
As you can see, I’ve got some bagginess going on in the bust.
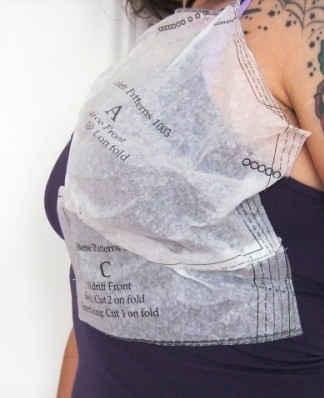
And on the side. See how the paper is wrinkling and standing away from my body? We need to get that sucker in.
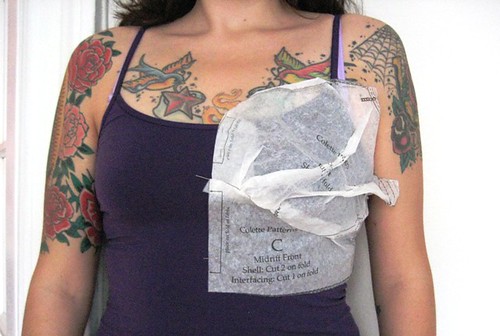
We’re going to temporarily pin the bagginess out in 2 places: 1) the side bust, where a bust dart would usually be, and 2) the top of the bust, extending from the armhole.
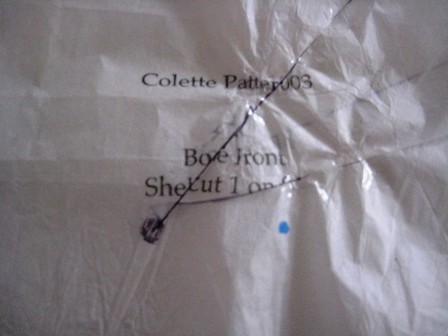
The first thing you need to do, though, is to mark the apex of your bust. Books often refer to the apex as the fullest part of your bust. An easier way to think of it is where your nipple is. There, I said it. All decorum is out the window now!
Use a pin to mark the apex. (I forgot to mark mine while I was wearing it, but you get the point, right? [Hee hee. Point.])
Now, start pinching out extra fullness in the bust, first at the side, then at the armhole. Have your tucks radiate toward the apex. Here’s how it will look:
And a view from the side:

When you’re satisfied with your fit, take the tissue off and set it on your work space. Mark your apex with a circle. Use a seam gauge to measure the depth of each of your tucks at the widest part of the tuck. (You only measure one side, so you’re getting half the amount you tucked out).
Record your measurements. Here are mine:
Tuck at armhole: 5/8 inch
Tuck at side bust: 1 – 3/8 inch
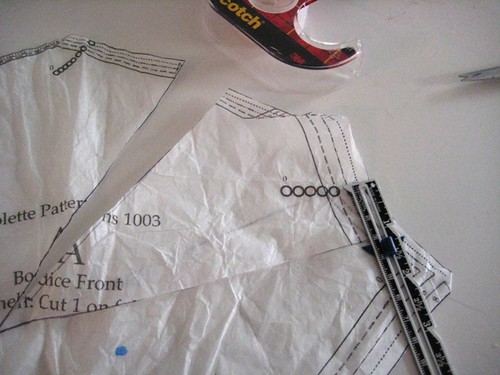
Keep your measurements handy, and remove all pins from the tissue. Smooth out the front bodice piece. Now you’re going to mark two lines to alter on your pattern.
First, imagine where a bust dart would be if this pattern had one. Extend a line horizontally from the apex point.
Second, mark a point halfway up the armhole. Extend a line from the apex to this point.

Cut these lines, leaving a hinge at the apex.
Overlap each of the lines the amount of your measurements you recorded earlier. Tape the overlapped pieces down.
As you can see, there will be a little wrinkling around the apex. Eliminate all the wrinkles you can and then smoosh the piece down with your iron so it lies flat. (Yes, smoosh is the technical term.)
Finally, true up the lines on your pattern. Tape the altered pattern piece down to a clean sheet of paper. Draw a new side seam and armhole seam to smooth out the jagged edges. You can see where I’ve done this in blue marker.
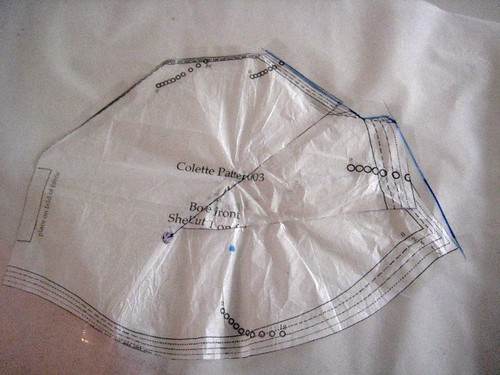
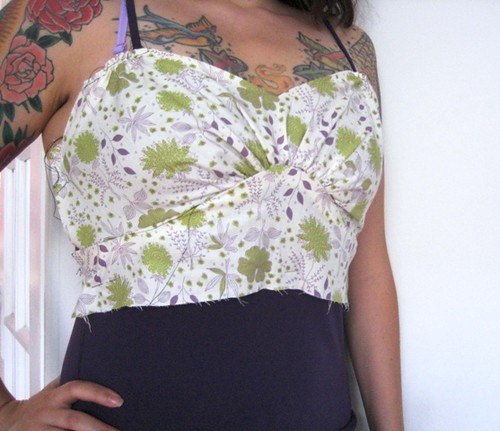
This is your new pattern piece! I’m going to make a muslin of the two patterns pieces we used earlier. (Actually, it’s fabric from an old curtain. I’m just like Maria Von Trapp! Scarlett O’Hara!) If you’re using expensive fabric for your dress, I suggest you do the same.
See? Nice and fitted!
That’s all there is to it. You can use these principles on lots of other patterns as well. The method I used for the Macaron dress is a little different (since the front bodice piece is longer), and I’ll do a tutorial on that one as well.
Let me know in the comments if you have questions!
Update: I forgot to mention two other changes you’ll need to make so that the new, adjusted front bodice piece will fit with the rest of the pattern. Here’s all you need to do:
1. Lay the front facing over the top of the new front bodice piece. You’ll notice that it will no longer match up between where the strap attaches and the side seam. All you need to do is tuck out the extra width from the facing piece and tape or pin it in place. Now it will match up with your front bodice piece.
2. The other piece affected is the back bodice piece. The back bodice edge will now be too long for the front bodice piece. So, just lay the two pieces (the front and back bodice) next to each other, as they would be sewn, matching them first at the bottom of the pieces. You’ll have some extra height on the back bodice piece. Measure how much extra you have. Mine was 3/4″. So I just used my clear ruler to shorten the back piece by 3/4″ along the top. Your back piece will be shorter now, but I found that this worked just fine.
Thanks Gertie! Again, be sure to check out her fantastic new sewing blog.
Comments
Casey
July 2, 2009 #
Thank you so much for sharing Gertie’s instructions here (and linking to her amazing blog–I’m hooked! :D). I dare say I’ll probably be doing a sba for this pattern (it’s in my stack of sewing projects to tackle next), and this will be super helpful! :)
Jessica
July 2, 2009 #
Excellent tutorial!!! So very clear with her photos and instructions, which is a first for me.
Hillary
July 17, 2009 #
I ordered Parfait on etsy last night, so in love with it I got carried away, but haunted today by wondering how I was going to pull off this adjustment. Remembering a joke about “easter egg hunt” in a recent commercial… Anyway, here it is fully illustrated, I can’t thank you both enough!!
Now I can’t wait for it to get here…
Serenity
December 3, 2009 #
Now explain to me how to increase a pattern for a LARGE bust
Sandy
December 5, 2009 #
Great tutorial and I will need it.
The designs are darling. I have not been inspired by the big name pattern designers and it is good to see something fresh.
Thankyou.
Sarai
December 6, 2009 #
Serenity, we might have a tutorial on that later, it’s usually referred to as a Full Bust Adjustment. There’s a great FBA tutorial over at Pink Chalk Studios.
Sandy, thanks for the kind words, I’m glad you like them!
Florence
January 31, 2010 #
Thankyou so much for this little tute. It is such an awesome pattern, but I knew that the bust adjustment would be an issue. The instructions were fantastic and it worked a treat.
lisa
February 13, 2010 #
Thank you thank you!! Every sewing resource I have has instructions for a large bust adjustment I’ve been looking all over for this. Off to the sewing room!
Laura Gribbin
March 17, 2010 #
Any tips on how to adjust a pattern such as VOGUE 8288 for an A-cup? My daughter is making a prom dress and this style top is so difficult to fit to a small bust. Too much fabric under the arm but taking in the side seams doesn’t do enough. There are no darts and no curves to reduce, so normal bust reduction techniques don’t help us.
Anyone?
Elena
July 1, 2010 #
THANK YOU!!!
Tilia
August 20, 2010 #
Very good tutorial except for the unprofessional ‘smooching the pattern flat’ when you actually have to open up (by making a cut to the apex point) the pattern somewhere else, in this pattern preferably at the bottom edge (where the gathering is). It’s only because of the flimsy paper you can do this, if you had transferred the pattern to decent pattern paper, the paper would protest heavily against this unfair treatment.
Kristina
October 22, 2010 #
This is great. I never see adjustments for small busts. Can you do the same for the Sencha pattern?
Jennifer
March 20, 2011 #
Simply inspiring! Job Well Done!
Janet
March 31, 2011 #
This will be very useful to me, thanks! It is hard to find patterns for a 30″ bust (that’s me–i’m regular-sized everywhere else) but this will help. It is frustrating that so many stores have “sized up” so that a 0 is a 34 inch bust–that’s why I have to make so many of my own things to get a decent fit! (okay, i am scolding a little, in a friendly way, that a 0 in Colette is a 33″, but that’s just cause I’m jealous they aren’t perfectly sized for me–i know, i know, you can’t please/fit every single person in the world!) Thanks for the lovely inspiration! :)
Annie
March 15, 2013 #
wow, this is great.
I am going to share this on my blog as I have been asked about this particular problem.
thankyou!
Myra
September 3, 2013 #
Hi. I’m just wondering if a sba would work for small ribcages? I am a B cup, but seem to be very small around the ribcage, resulting in a small ‘bust measurement’ on paper. The dresses I seem to make gape under the arms, but I’m worried if I do a complete sba, the bodice won’t fit over my bust. Suggestions? I’m looking at making a parfait and a laurel, but the laurel finished dimensions bust equate to 35 3/4 inches – I’m 32 inches with a bra on, so an extra almost 4 inches seems like it will gape like crazy. I know it’s supposed to be a relaxed fit, but I think I need to reduce it somehow. Help.
DrWhoMom
September 27, 2013 #
I’m WAY fluffier, but a slightly easier (to me…) version –
El cheapo fabric that’s of similar weight. I draw the pattern out way bigger (i’m trying to cover 41 apex with a 31 underbust), and pin to a cami over the bra I wear. The fabric lays/mashes nicer than paper, so I can actually see the fix I’m doing. Once I’m good, I carefully remove the fabric from the cami, and lay it on whatever I’m using to cut patterns from (erm, this week, it’s worn out file folders)