
 Sign In

Tutorial: How to make continuous bias tape
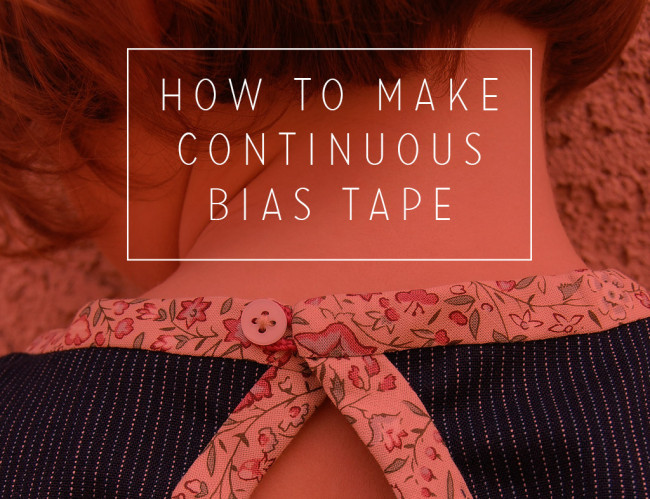
{photo of floral bias tape trim by uklassinus}
As mentioned previously here, bias tape is pretty, useful, and adds a unique touch to garments. It’s also a fabulous way to use up scrap fabric from other sewing projects. After sorting through photos of bias tape for inspiration, I want to hole up in the studio and transform pieces of left over fabric into enough bias tape to reach the moon! Luckily, this tutorial simplifies the process of making bias tape by allowing you to avoid stitching each individual strip together, hence the name continuous bias tape.
If you have any questions about the why & how of bias tape or just want to see an alternate technique, check out Sarai’s tutorial, which uses a strip piecing method rather than a continuous loop. The benefit of the continuous loop method is that it’s much faster, because there’s less pinning and sewing.
Also note that I used a 10″ x 10″ square of fabric for this particular tutorial, but if you have less material to work with that’s okay, too! Just make sure you have enough fabric to cut out a perfect square.
You will need:
- 10″ x 10″ square of fabric
- a ruler
- fabric pen or chalk
- scissors
- a Clover bias tape maker in 1/2″
- thread
- a sewing machine

Step 1: Cut a 10″ x 10″ square piece of fabric, then cut it in half diagonally, along the bias.

Step 2: With right sides together, pin the two triangles together at either of the straight sides (not the diagonal side), as shown in the photo. Edgestitch the two pieces together.

Step 3: Open up the fabric pieces and press seam apart (aka bust with the iron). The fabric should be the shape of a parallelogram.

Step 4: Starting at the edge of the fabric, mark 1″ lines in washable fabric pen. These diagonal lines will be parallel to the fabric edge and will be drawn on the wrong side of the fabric. Don’t cut yet!

Step 5: With right sides together, fold the narrow tips of your parallelogram lengthwise to make a small square.


Step 6: Once folded, offset the 1st row and pin in place. Then, match up the following lines while pinning in place with right sides together. You will be sewing these pieces together t 1/4″, so be sure to match the lines at the seamline (1/4″ in from the edges) not at the raw edges.
You should now have a tube like shape with 1″ of fabric offset at each end. Sew a narrow 1/4″ seam. Press seam open.

Step 7: Starting at the first offset row of drawn lines, cut until you reach the end.

Step 8: You’re almost done!! Now pull your continuous bias tape strip through your bias tape maker while pressing the folds with your iron. This should produce nearly 100″ of bias tape, depending on how accurately you mark each line in Step 4.
Yay!! Which method of making bias tape do you prefer? The continuous bias tape method (shown here) or Sarai’s strip piecing bias tape technique?

Comments
Lindsay
January 21, 2011 #
Wow that looks like a great way to do it. I’ve always liked the idea of taking a fabric and making your own binding so you could have the pattern you wanted, but the thought of sewing all the strips together rather put me off. This looks a lot easier.
Geeky Sweetheart
January 21, 2011 #
OH MY GOD – you just BLEW my MIND! why Have I been wasting my TIME sewing TINY bits of fabric together WWWHHHYYY?!?!?!?!?!?!!
thx x
xG
Mia
January 21, 2011 #
You have perfect timing!!! I need to make some bias tape for a couple of projects and I will definitely be trying out this technique.
Kerry
January 21, 2011 #
This is brilliant! I made bias tape for the first time last weekend for a piped edging for my Crepe, and spent so long piecing the bits together. I’ll definitely be giving this technique a try. Thank you!
monkeysocks
January 21, 2011 #
This is genius! So much easier than sewing lots of fiddly little strips together and them not lining up properly!
Plus it is all slightly like a mobius strip magic trick which pleases my inner child AND mathematician!
Stephanie
January 21, 2011 #
Wow! That looks pretty easy. I’ve only made bias binding tape once, and I had to do it twice as my first one came out much too narrow. This looks super simple. I’m definitely going to have to get one of those handy bias tape maker.
Rachel
January 21, 2011 #
If you want wider bias tape, try making the strips 1 1/2″ and experiment with different sizes of Clover bias tape makers!
Tabatha Tweedie
January 21, 2011 #
GENIUS. I’m going to try that. Can’t believe how much bias tape you can get out of a small bit of fabric! Hooray!
Rachel
January 21, 2011 #
It really is amazing how much you can make from such a small piece of fabric!
Karen
January 21, 2011 #
That is soooo clever! Wait – there’s such a piece of equipment as a bias tape marker? My studio investment will run and run, I can see. There’ll always be some new bit that I just have to buy… What a truly revelatory tutorial. Thank you.
Rachel
January 21, 2011 #
It seems like there are always more sewing notions to be had…but it’s so fun collecting them!
Susan – Knitters Delight
January 21, 2011 #
I agree with everyone, this is a GREAT way to make bias tape. I am going to try it asap. I love the inspiration photo you chose also. Thank you for this tutorial!
Miet
January 21, 2011 #
Brilliant – thank you!
Michelle Engel Bencsko
January 21, 2011 #
This is extremely helpful!
Ms.Cleaver
January 21, 2011 #
I use the continuous method, it can be a bit fiddly to line up the seams, but after that – easy-peasy!
Rachel
January 21, 2011 #
I agree, it took me awhile to master this technique. I botched it the first few times!
Jodie
January 21, 2011 #
I’ve been strip piecing, but have always wanted to figure out the continuous. This tutorial really cleared it up for me! I also love how you did it with so little fabric. I always felt like you needed a huge amount of fabric to get very much tape. Can’t wait to try this out!
Rebekka
January 21, 2011 #
Wow. I’ve always pieced – I had no idea there was any other way to do it. I think the explanation exploded part of my brain, but I’m definitely going to give it a try.
BTW – love the color combo in the picture at the top.
Rachel
January 21, 2011 #
Hopefully the photos will help if you get confused. Feel free to ask any questions you may have!
Sony
January 21, 2011 #
I had read about making continuous bias tape before but I could never quite understand the directions – these instructions along with your photos have made it clear! Thank you!
Jessica
January 21, 2011 #
This is amazing! What a time saver. I have read instructions on making continuous binding from a quilting magazine in the past, but it never clicked for me. I think your scaled down sample made the concept so much easier to understand. Thank you! Happy weekend sewing to all!
Michelle
January 21, 2011 #
I’ve always made it the strip piecing method (and generally mess up sewing the strips together once or twice. I will have to try this. Do you have formula on how to figure out how much bias tape you will get from a ___ sized square?
Rachel
January 23, 2011 #
I took this little tidbit from Sarai’s post on bias strips, hope it helps!
“First, figure out how many square inches your rectangle is by multiplying the length by the width. Now divide that number by the width of the strips you’ll be cutting. That will give you a rough approximation”
Rachel W
January 21, 2011 #
Oh, this is fantastic, thanks! I was balking finishing a project because I didn’t have any bias tape on hand, and I dread piecing together stupid little bias-cut scraps. This blew my mind and saved that skirt!
Something in the way she sews
January 21, 2011 #
Such a helpful tutorial, I had never come across this method before. I’ll hopefully get the chance to use this soon.
The Straight Grain
January 22, 2011 #
Oh, this is fantastic — can’t wait to try it! What a great use for all those big scraps I can’t bear to part with…
Meg
January 23, 2011 #
I think this is what’s been missing for me to start making my own bias tape!
Carolyn
January 24, 2011 #
This is pretty clever for getting continuous bias out of a small piece of fabric, and the directions are wonderfully clear. My only concern is just how many seams are going to be in it because of the seam between the two triangles in addition to all the ones between the strips. I’ve used the continuous method many times before, always starting out with the parallelogram. If you have a large enough piece of fabric to start with that you’ll have half as many seams.
Just my 2 cents.
Connie
January 25, 2011 #
I use a combination of these methods. I use this one through step 4, then I cut with my rotary cutter and sew together. I will have to try it this way. The bias tape maker is a genius invention that I won’t do without ever again. I used it for the first time making Christmas presents and loved it. I was worried because I sometimes have problems getting perfect, straight cuts but it didn’t matter. Love this tute.
Connie
JILL
January 25, 2011 #
I love the continuous method. But after many, many times of doing it wrong, the one piece of your awesome tutorial I would stress is the need to OFFSET THE ROWS when pinning. Many is the time I forgot to offset and started cutting, only to cut tubes of strips – instead of the continuous loops. Great tutorial!
Stephinie
January 31, 2011 #
I think I love you! I have made bias tape so many times burning my fingers and forever cutting these little pieces of fabric…. this rocks!! Much sewing love sent your way….. handmade bias making, I am back! (too much coffee this morning, lol)
Alessa
February 2, 2011 #
Wow, how smart! That’s making a whole lot of bias tape from a small bit of fabric!
I need to get a bias bind maker…
Reader
June 19, 2011 #
I tried this method once after reading this, with muslin, and found it awkward and imprecise. I also had a lot of seams, which, in some cases, ran in opposite directions.
I’m going to stick with the method I was taught: drawing a two-inch square at the selvage, drawing a diagonal through the line and drawing bias strip lines from there.
I have one bias strip maker somewhere, but it’s easy enough to crease the strips myself.
Joan
August 9, 2012 #
This is a method I’ve never heard of, but it sure sounds simple and practical. I think I’ll have to give this a try soon. It sounds like it could be even simpler than the continuous method, since I don’t have those special scissors my aunt used.
Joan
Karen
July 5, 2011 #
Do you know if this will work with jersey material? I was looking for a way to finish off a t-shirt that I’m making, both for the armholes, and the neck. I’m not even sure if I can iron cotton jersey and have it stay.
Adri H.
November 8, 2011 #
Lovely tutorial! Thanks for sharing it… I have just 1 question.
About Step 4 – Should the marked lines be set along the long edge of the parallelogram or the shorter edge?
Sarai
November 8, 2011 #
Hi Adri. They’ll be along the long edges. That way, when you fold the two shorter edges together, the lines will meet up, as in the photo. Hope that helps!
adri h.
November 26, 2011 #
It does. Thank you!
Felicity from Down Under
November 26, 2011 #
Thank you, thank you, thank you. I have recently been saved from going mad (when making a lot of bias tape) by the ease of this method. It enabled me to churn out metres and metres and metres of fabulous tape in almost no time flat. And I found the bias tape maker very helpful in the process too. Yes, I know it’s possible to make bias tape without such a gadget but there’s no doubt that it is a very handy, timer-saving tool. Did I say thank you? Thank you!
Diane
December 13, 2011 #
I made bias tape for the first time a couple of weeks ago, I made 18 pillowcase dresses for Little school girls of Haiti, the instructions required bias tape and it was way too expensive to buy so I made it myself, turned out great. Thanks for the tutorial.
Marie
March 31, 2013 #
I am making pillowcasedresses for Dress A Girl Around The World.
I have completed many of them. Stopped counting when I reached 100.
I too make my own bias binding. Buying it is very expensive and there are only solid colors.
If you want to share your methods, please contact me at mwline@aol.com
Thank you
bobbi
March 5, 2012 #
This is such a help. Thank you.
Marcy
April 4, 2012 #
This is a printable, paper bias tape maker for whatever width bias tape you want: http://scientificseamstress.blogspot.com/2011/10/printable-bias-tape-maker.html
Cate
April 16, 2012 #
I tried the continuous bias tape method five times, and it just was not working for me! I’m sure it was due to my inexact line drawing on the fabric (or the spatial relations complexity of it all!), but it was making me a little nuts. I even have that delightful little bias tape gadget, as I found it on sale and was stoked to make my own fabulously foxy tape. The only method that worked for me was the old school, “90 degree angle, stitch the pieces together” method. And now I understand why creating your own bias tape gives you such a small, delightful thrill…I’ll be making some more tonight! Thank you for sharing both tutorials–your site is wonderful.
Catey G
April 16, 2012 #
Thank you — this is so magical! The first time was not so great — you don’t want to know (and I don’t want to tell you) the silly user error I made. But second time around I cut a 20 x 20″ square and used my 1″ Clover gadget. Now I have really wonderful printed bias tape and a cool new gadget. I am a sewing newbie and I found the instructions easy to follow and thorough. Thank you so much for sharing such a great tute!
Jul
April 18, 2012 #
I loved this easy way to make bias tape- it worked the first try! Thanks so much! Now do you have a no fail way to sew it on neatly????
Katie
July 11, 2013 #
The best way to sew on bias tape quickly and neatly is to use a bias tape foot on your sewing machine. You don’t even need to pre-press the tape strip you have created. You just feed it into the foot, place your main fabric into the centre slot and start sewing. The foot folds it neatly and feeds it straight into the needle.
Brittany Cole
April 20, 2012 #
I can’t wait to try this technique! I have wasted to much time sewing those teeny tiny seams. Thanks so much for sharing! My crafting time is so limited with a 9 month old it is great to find ways to be more time efficient! Again, thanks!
Anda
April 22, 2012 #
Thank you SO MUCH for this little how-to. It’s been so long since the 9th grade that I had forgotten how to make this continuous tape. I wasted a batch before I followed your instructions step-by-step. Now I can complete my chair!
Anda
Brandy
April 30, 2012 #
It had never dawned on me that a 10″ piece of fabric could be quite that useful :) Thanks for sharing!
Pamela
May 2, 2012 #
HOORAY FOR YOU AND THIS WONDER-FULL TECHNIQUE!!!!!!!!
Joy
June 7, 2012 #
I finally got the technique right – after 3 tries…..yay me!!!!! I had some fat quarters and scraps from cutting out a dress. I will be making tape to use up leftover cloth.
julie
June 8, 2012 #
I love this method, I can’t remember where I learned it many years ago, but it is truly one of the most valuable skills I have!! :)
handwashcold
June 12, 2012 #
When I learned to make bias tape, I did the “itty bitty piecing” method maybe twice, before I found this way. I LOVE it…once you can get past the confusing messiness of sewing up what seems to be the seamstress version of a Mobius strip! Only way to go…it’s SO much faster!
Candace
June 12, 2012 #
I love this tutorial! I am new to sewing and bias tape, and was able to follow your instructions with encouraging success. Thank you!
Terri
June 13, 2012 #
I have a question. With the picture on the top of the page you have a busy print vs a solid print in the tutorial. Do I need to worry about matching up the designs or will it blend in? And if it just blends in, should I make sure it is a small busy print so the eye doesn’t notice where the bias tape is seamed together? I hope I am making sense to you, lol. Great tutorial by the way!!
Sarai
June 13, 2012 #
Because of the size of bias tape, you’d usually want to choose a rather small print which will tend to blend well at the seams. But I’ve also seen a lot of stripes and dots, and the seams are rarely noticeable. Overall, I’d say that small prints do work best.
Joy
June 13, 2012 #
I have made it using whatever – my feeling is that most people aren’t going to be right up on you. if it is around an armhole then I try to place any seams under the arm…..I love this technique, once you do it a couple of times it goes pretty quick
Joan
July 4, 2012 #
I am so gladd I found this tut! I need a couple of miles of bias tape (well, that IS a bit of an exxageration, but I do need a lot), and I knew that I had made enough bias for a bedspread yrs. ago, and that I cut up a square, and stitched it bqack, offsetting the fabric somewhere, but my aunt guided me, and I couldn’t remember just what to do. This is a godsend. It seems to meshe gave me some kind of special scissors to cut the tape w/ – it had a guide that you set w/ a screw, that helped you to cut it the right width. Am I imagining these scissors?
Joan
Sarai
July 5, 2012 #
Joan, I’ve seen pictures of such scissors with a seam guide, which I think used to be more available years ago.
Here’s one I found via pattern review: http://seamallowanceguide.com/
It’s magnetic and simply attaches to your scissors. I do wonder if this could be DIY’ed somehow for cheaper though?
Joan
August 9, 2012 #
Colette, I saw that gadget before – seems very clever for adding seam allowances, and I think you are right, it would work here too. I showed it to my husband, who is very good at making gadgets like that, but couldn’t get him interested in it for some reason. He was much more interested in making something which would make a lot of noise, like some kind of new lawnmower, instead! Maybe I can make it myself! It looks like it’s just a couple of magnetswith covers and markings on them. I had forgotten all about them! Thanks again.
Joan
dee whisnant
July 17, 2012 #
duh! don’t know why I hadn’t thought of this before! THANK U for reminding me to use the other 90% of my brain….:) LOVE it!
Gail
July 31, 2012 #
Oh my! I agree with everyone who’s admitted to nearly “fainting dead away” when finding your tute! How many brain cells has we all wasted while piecing and sewing our bias trim?
I can’t wait to get to my next project…usually dread making the “coordinating fabric bias trim” for things, usually opt for the fugly packaged stuff. Thank you SO much for posting this life changing information for those of us who can’t think outside of another trip to the fabric store…
Shannon
August 12, 2012 #
Also tutorials on Pinterest for using cheap box cutters with blades removed for bias tape maker! Want to try this even with other projects started and don’t need this yet.
Joan
January 14, 2013 #
A boxcutter? This I have to look for, just out of curiosity!
Kate Joekel
August 30, 2012 #
I have been sewing for almost 50 years and I learn new things from you all! So enjoy all the tips and techniques and patterns!
Helen Davis
September 9, 2012 #
I have made several quilts, and I learned to make my bias binding out of a sheet its made like the fabric you are using,and makes enough bindind for several quilts.
Antonia
September 17, 2012 #
I began looking for these directions years ago knowing they existed and here you have it! I’m all about making life easier and I just love having bias tape specific to my project. Thank you for the clear and concise directions. (and for including photos!)
Estela
September 20, 2012 #
I had been looking for this method. I had used it in the past and forgot hot to make the tube so thanks for your post it reminded me of it. By the way I also posted about bias but mine is to attach with a piece of cardboard casing taped to the sewing machine table. You can see it at sewingwithbrigalidbyestela.blospot.com hope you like it and share it with everyone, thank you again with this tutorial!!!!
Hilary
September 29, 2012 #
I need a lot of bias tape can you use larger squares.
Joan
January 14, 2013 #
From experience, I would say yes. When I made all the bias tape for the bedspread and 4 large bolster pillows to go with it, I used larger squares, but I can’t tell you exactly how much larger. I used it for piping, and it seemed like I made miles of it. Each bolster was probably 5 to 6 yards of piping, and around 3 sides of the spread, well, you can envision that.
Malady
November 17, 2012 #
OMG – NO ONE EVER has shown the cutting step properly like that in ANY of the tutorials I’ve seen!! People generally just say “cut along the lines” and take a photo of the tube sitting on their cutting board with a rotary cutter nearby… I couldn’t work it out (clearly I’m a bit slow!!) Thankyou for showing the secret LOL
Kayleigh Garner
November 19, 2012 #
I used this tutorial and it worked brilliantly! Thank you :)
Linda
January 13, 2013 #
Am the only one doing this wrong? Once I match my lines and sew up the side with a 1/4″ seam allowance, the lines no longer match up and are impossible to cut. What am I missing?
Joan
January 14, 2013 #
Linda, did you remember to offset the first line? I think that’s the easiest thing to miss, and if you do, everything will be off. It just won’t work w/o that offset. Otherwise, I don’t know what the problem might be.
Linda
January 14, 2013 #
Thanks Joan – I did offset the first line, but for some reason it doesn’t seem to have worked. I noticed there are a couple of youtube videos devoted to this, so maybe I’ll check them out to see where I’m going wrong. Thanks!
Sarai
January 14, 2013 #
Linda, another idea… are you matching up the lines at the seamline (not the edge)? You should try to match them up 1/4″ from the edge, not at the actual edges. The easiest way to do this is to stick a pin through the lines at the seamline to make sure they line up.
I’ll edit the post to make this a little clearer, and hopefully do a video on it someday myself!
Linda
January 14, 2013 #
Thanks, Sarai — that’s exactly what I was doing! This makes much more sense – I will try it again :)
Marie
March 31, 2013 #
I too make my own continuous binding and make pillowcase dresses for
Dress A Girl Around The World. If you care to share your dress experiences with me, that would be nice.Thank you. Marie
Bindi
April 17, 2013 #
thanks for fab tutorial, I had often wondered how to do this and got it right first time . Brilliant
Nancy
April 27, 2013 #
I will be trying this tomorrow, to finish off your Sorbetto Tank Top, my first time making my own bias tape. Thanks for the great instructions!
Monica Cook
July 5, 2013 #
Wow! thank you! thank you! thank you! doing bias tape around gaucho pants for girls at camp and you have saved me hours of extra sewing.
Katie
July 11, 2013 #
I really like the idea of this method, but found it to be fiddly to get the second seam lined up correctly. It also meant I had to hand-cut the strips (rather than using my quilting ruler and rotary cutter, and there ended up being too many seams for my liking. It’s a nifty idea, but I think I’ll stick to cutting my 1″ strips and piecing them together.
The bias tape maker looks quite handy, but I’m fortunate enough to have purchased a bias tape foot with my new sewing machine. I just feed the completely flat tape into the foot and it does all the folding for me.
Bonny
January 25, 2014 #
I’ve seen bias tape made similar to yours, but with only 1 seam to sew. If you draw a square of fabric, on the bias, draw the lines, and then sew the opposite sides together – moving where they meet up 1 row – you only have to sew them together in 1 seam. This probably requires more fabric, though.
Lyric
April 11, 2014 #
As a neophyte vintage sewist bias binding is definitely on my radar. Looking forward to mastering this technique.
Thank you for sharing this tut.
Cheers,
Lyric
http://www.sewcroandquilt.wordpress.com