
 Sign In

Tutorial: How to create a french seam
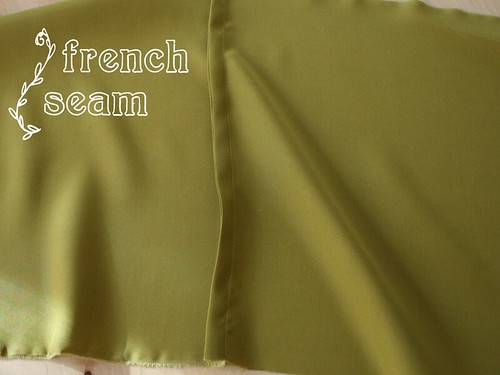
French seams are wonderful for professional-looking, clean seams. The raw edge of fabric is essentially encased within the seam. They are perfect for light, delicate fabrics such as silk. This tutorial will produce a 5/8″ seam.
If you are making this silk scarf, you can use a french seam to join the two pieces of fabric end to end. While the seam will be visible, it will look very neat.

Pin the seam, with the wrong sides together.
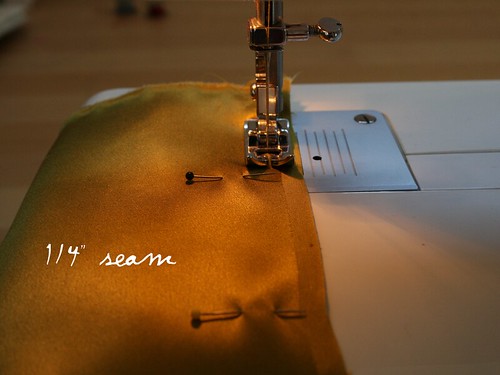
Machine stitch, using only a 1/4″ seam.

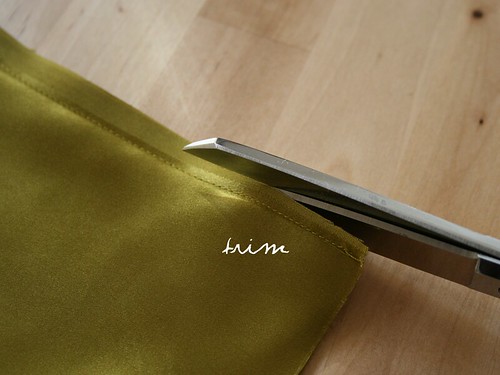
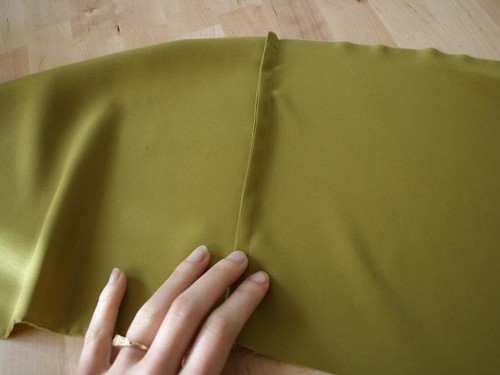
Press the seam flat, then trim close to the seam.
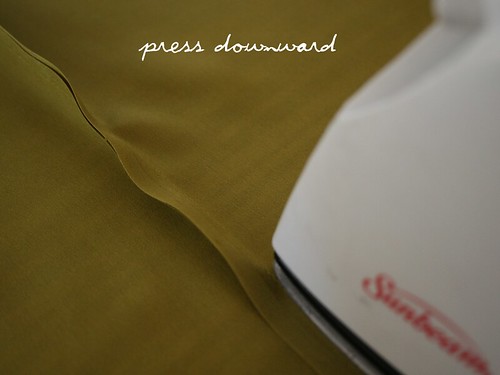
Now press the seam downward.
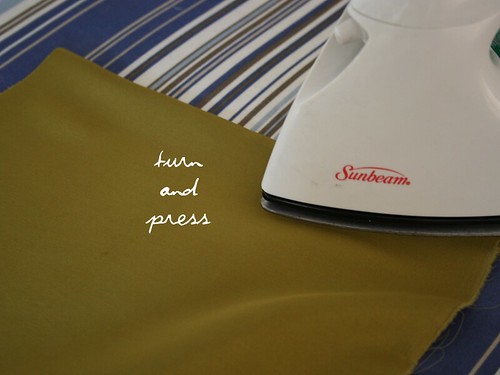
Turn the fabric, so the right sides are now together. To help turn the seam, it can be helpful to run the tip of a knitting needle along the inside of the seam. Press the seam.
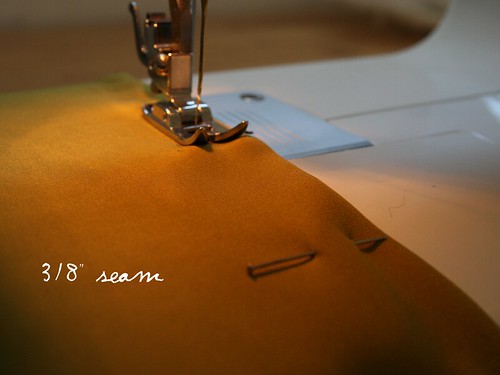
Stitch again, this time using a 3/8″ seam allowance. this will encase the raw edge.
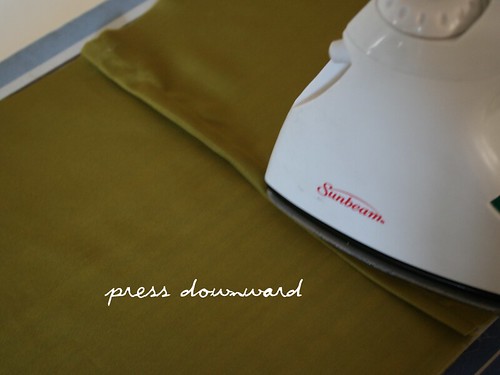
Press the seam downward to finish the seam.
To finish the scarf, create a hand rolled hem along the four sides.
Comments
Sylvia Adams
December 1, 2008 #
Hard to see how you would make a rolled hem over the french seam. Would it not be better to do the rolled hem first, then seam the two pieces together. Or, cut the scarf running crossways (on the weft) so no seam is necessary.
Sewist
September 13, 2010 #
I thought the same thing. Personally, I’m not so sure that making a scarf with a French seam looks very good, although I enjoyed reading the tutorial.
Sarai
December 2, 2008 #
Sylvia: If you press the seam flat, it’s not too difficult. Personally, I think it looks better to do the seam first in order to make it less conspicuous, but obviously that’s up to the sewer. :)
As for cutting it on the crosswise grain, that’s an option as well, but the scarf would not be the extra long length pictured.
Elsie
March 11, 2009 #
You have given me courage ! I am making a dress for my 12 year old granddaughter and wanted to do a scarf, I am going to try this and hope it works. I had no one to ask and have not sewed many clothes since my own girls were young. Thank you I’ll let you know how it turns out.
Debbie
April 15, 2009 #
re ur french seam tutorial – thanks for the info but I just thought you should know that the link for “this silk scarf” is broken.
Sarai
April 15, 2009 #
Debbie, sorry you had trouble with it but the link appears to be working for me. Hmm.
Jeannette
April 22, 2009 #
I was looking up how to make a baby sling, and in the directions it says to use a french seam. I’m trying, but I still don’t quite understand what it is, and why this is the beat seam for holding in babies. I’m not saying your tutorial isn’t a good one, but I’m not sure I understand the seam. is there something I’m just not picking up on? I’m not a huge sewer, but I’d like to become one, and I’d just like to get this right. is there any easier way of explaining it to a new sewer?
Linda
March 12, 2011 #
Years ago, this seam use to be made by, by making a regular seam, cutting half of the width of one piece of the seam, turning piece that is left in half and lining it up with bottom of the piece you cut in half and sewing it together.
The new method, looks much easier to do.
Sarai
April 22, 2009 #
Hi Jeanette. A french seam is used basically to make your seams look neat, so there are no raw fabric edges showing. There’s no reason it’s better for holding a baby, except that it looks neater and perhaps will prevent stray threads from getting on the wee one.
Jeannette
April 27, 2009 #
thanks. I figured it out, and the sling is great! I sewed it down (like on the outer seam of jeans) and it’s working great.
Lisa
August 8, 2010 #
To Jeannette:
I think that when you fold the seam down and stitch the edge again it is called a “FLAT FELL” seam.
I really appreciate this description of french seams as I have not sewn since high school – about 30 years ago.
I want to use french seams in duvet covers I’m planning to make next week.
Renee
October 3, 2009 #
Debbie is right, the link is broken. You can probably see it because you’re logged into the blog. Try changing “.local” to “.com” in the URL.
Thanks for the tutorial!
Sarai
October 4, 2009 #
Thanks guys, the link should be fixed now. Sorry about that!
marie
November 22, 2009 #
Mmmm… Strange. In french, we call these english seams (!?).
Sewist
September 13, 2010 #
une couture anglaise
Sarai
November 22, 2009 #
Marie, that’s so funny. I wonder what they call a hong kong seam in hong kong!
Sylvia
March 12, 2010 #
Okay, what is a hong knog seam?
Sarai
March 13, 2010 #
A hong kong seam is a name for a seam in which each raw edge of the seam is encased in bias binding. It’s very labor intensive but a wonderful finish!
Sylvia
March 13, 2010 #
Thanks for describing a hong kong seam and for not pointing out that I transposed my letters in kong.
Dora
March 17, 2010 #
Ooh, thank you! Wonderfully clear instructions!
Ashford
July 1, 2010 #
Can you use a French seam in the side seam where you have a bust dart?
Sarai
July 1, 2010 #
You absolutely can. I suppose the only exception might be if your fabric is bulky, but french seams are normally used on very light fabrics, so bulk shouldn’t be a big issue I wouldn’t think.
Sewist
September 13, 2010 #
Sure. The next time you’re at a store look at some nice women’s blouses.
JuliW
December 1, 2011 #
Sarai, thanks for the french seam tutorial. I have a length of silk chiffon that I’m going to use to make a blouse. It has a tendency to ravel and I had been considering how to keep that to a minimum in making the top. The french seams and hand rolled hem will do that beautifully.
hanna
April 4, 2012 #
how is this different to a flat seam??
nubbystubby
August 6, 2012 #
I sewed for a handbag company that utilized french seams often. I love the french seam and I also love the hand sewn rolled hem. Hand sewing is my preference, so I will definitely be using it to make scarves from large remnants I purchased that were marked down. Thank you for the great instructions!!!
Kaylee
September 13, 2012 #
I Still Don’t Know How To Do It And If I’m Supposed To Use Two Fabrics Although I Am Using Calico.
Carolyn Bernd
September 13, 2012 #
Thank you for reminding me how to do a French seam with your easy to follow tutorial here! I found it when I Googled French seam, and will look at your patterns when I have more time!
kate
September 19, 2012 #
Thanks! Great tutorial! I also was looking up another tutorial that told me to use a french seam to finish off a baby wrap! I sew quite a bit, but had never known the term for a french seam.
Linne
December 24, 2012 #
French seams are great for baby wraps; they keep the raw threads out of baby’s reach. They also make for a stronger seam, which is a good thing, as babies seem to grow amazingly quickly, getting heavier all the time!
Trish
March 3, 2013 #
Thank you for such an ‘idiot-proof’ explanation to french seams. I have recently got myself a sewing machine and want to encourage my daughters to take up machine sewing too and your tips and hints have been great :)
Trudy
August 16, 2013 #
Thanks so much! The little bags I’m making are sooo much nicer now! Legend. Is this also called a flat seam? What is a flat-felled seam?
Lanetta
September 16, 2013 #
Another fabulous tutorial! Thank you for taking the time to create and share! In today’s article, I put a link so my readers could also find you!
http://lanettascreations.blogspot.com/2013/09/the-art-of-seaming.html
Mary Ann Preckol
June 18, 2014 #
No matter how I try I just can’t seem to catch on to the French sea, any tricks or a new and better method?