Tutorial: A simple way to sew facings with invisible zippers
Once you’ve got the hang of sewing invisible zippers, you may wonder what the best way is of attaching a facing or a lining to it. This method is machine sewn and the seam allowance is tucked under leaving a clean, finished look. Our Ginger skirt pattern uses a variation on this technique, so you could use either method for the skirt.
-
Tools Needed
- zipper
- garment
- facing
- scissors
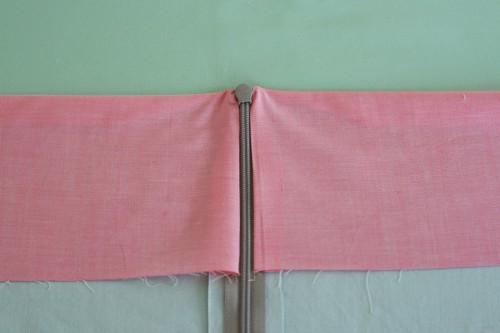
1. Install the zipper. Insert invisible zipper using our invisible zipper tutorial.
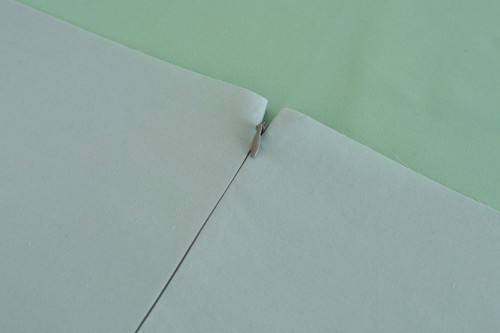
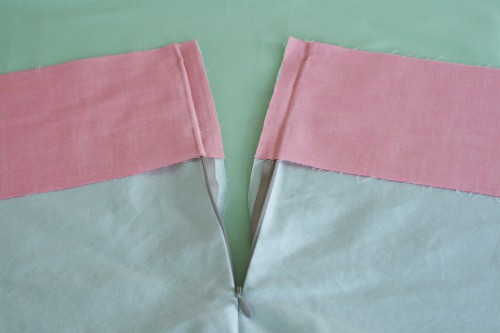
2. Sew the facing along the waistline. To do this, first open the zipper. Place the right side of the facing down against the right side of the fabric. Stitch, making sure to sew to the end, over the top of the zipper.
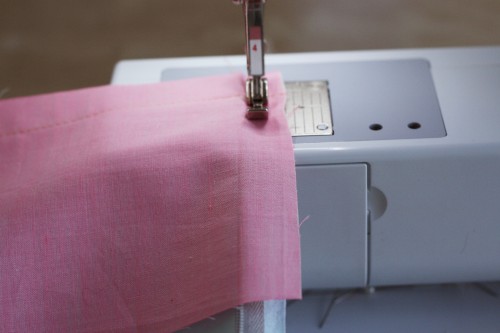
3. Sew along the zipper. Use a zipper foot to sew down the side of the zipper.
4. Do the other side in the same way. Repeat steps 2 and 3 for the other side of the facing.
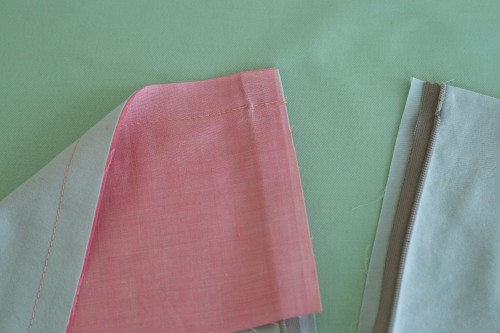
5. Clip the seam allowance. Grade seam down at the corner.
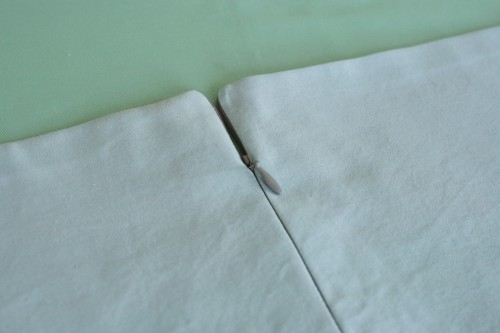
6. Turn out and press. Use a point turner (check out our handy point turner tutorial!) to turn the point. And you’re done!
Note: if you want to add a hook & eye closure, simply lower the zipper to allow sewing space for it.
Related posts you might be interested in:
- How to use a bamboo point turner: Easy techniques for better, more pointy corners.
- Installing an invisible zipper: How to sew an invisible zipper using an invisible zipper foot. It’s easy!

 Sign In


Comments
Hatty
July 5, 2011 #
Way hay, Kathleen Fasanella’s methods spread by word-of-blog…
Sarai
July 6, 2011 #
I’m not sure what this means, Hatty.
Caroline
July 10, 2011 #
http://www.fashion-incubator.com/archive/centered_zipper_construction/
This is a link I found many months ago which is what I think Hatty means. Nifty RTW tricks!
Sarai
July 11, 2011 #
Oh yes, that is actually the method I use (and outline in some patterns)! It’s a little different than the one explained here, though.
I like the fashion incubator method a little more, but I think the one Caitlin describes above is a little easier to understand. Pros and cons, as always! :)
Laura
July 5, 2011 #
Wow, thank you so much! Can’t wait to try this out!
Deanne
July 5, 2011 #
Nice! I have had trouble figuring that one out. I can’t wait to try this either!!
Lisa
July 5, 2011 #
Great tutorial! This came just in time, as I was in the process of figuring out how to do this AT THIS MOMENT! Thanks so much!
Sarai
July 6, 2011 #
Don’t you love when that happens? Sewing serendipity!
Samina
July 5, 2011 #
Thank you. I love you for this. My facings always look wonky at the zipper edge. Now they won’t!
Brittan
July 5, 2011 #
great tip! Thanks for posting this :) I love these little sewing lessons! xo
Katy
July 6, 2011 #
Thank you this is helpful. I just have to pluck up the courage to clip that close to the seam now!
Sarai
July 6, 2011 #
Katy, you can always reinforce that part of the seam with a second little line of stitching, very close to the first one. Then you can clip closely with more confidence!
Debi
July 17, 2011 #
Love this! Thanks Caitlin and Sarai!
Sewbee2
August 3, 2011 #
Very good tutorial, but as an alterations seamstress I will remind everyone that it is NOT and NEVER will be easy to replace an invisible zipper and they FAIL so VERY often! Only use these in formal wear! I won’t use them at all! NOT PRACTICAL! But then, I like my garments to last!
Patrice Bell
August 11, 2011 #
Very informative. Found this in th ASG newsletter.
Pam
September 1, 2011 #
Looking forward to seeing some cool ideas.
Cey
September 4, 2011 #
Hi Caitlin & Sarai……This is awesomeness!!! perfect for my first attempt of sewing my wedding dress…. this will help a lot! Thanks again guys! God bless! ;-) & more power!
K-Line
March 7, 2012 #
I love this method. I’m currently making the Ginger skirt and I have a dilemma: I have an invisible zip, but not in the right colour. I also have a regular zip in the perfect colour to match the fashion fabric. Is it possible to get the same neat finish at the top of the Ginger (where facing joins to waistband) using a regular zipper? I don’t mind seeing the zipper from the front but I’ve never been able to get as nice a finish with a regular zip as with your invisible zip tutorial. Is there a way to modify the tutorial to suit a regular zip? It would be nice to use the right zipper colour (it’s a weird colour and I couldn’t find an invisible zip to match). Thanks for feedback!
Cyn ;)
March 18, 2012 #
OMG – that was soooo easy. I was stressing about that all day. Used for my flower girl dresses (I’m making two for 3-year olds). Was worried since there is a layer of chiffon, silk, and slip. Thanks so much!!!
Kate Setzer Kamphausen
April 10, 2012 #
I could NOT remember how to do this today. Thank you!!!
freetutorials
April 16, 2012 #
Reaalllyyy niice…thumbs up
Mia
June 2, 2012 #
Thank you for this! I’m off to practise. Just love your web site and these ‘snippits’.
Noelle
August 14, 2012 #
This is great! I just used it, and the results were fantastic! Thank you!
Nothy
November 27, 2012 #
I am so glad I found this- I am making a dress and decided to add my own facings and wasn’t sure how to do with facings with an invisible zipper…this worked like a charm! Thank you for posting it!
Deb
December 13, 2012 #
I’ve had this tutorial saved in my bookmarks for ages waiting to need it, and today I’m actually going to use it. Weird how something so simple didn’t come to mind for doing this on my own!
Thanks for posting this. :)
Sarah
November 1, 2013 #
Hi Sarai,
Just wanted to say thank you for this excellent and so so simple tutorial! I was struggling with my pattern. I could understand how the finished product was supposed to look, but the instructions made no sense. Your tutorial made this step so simple! Thank you!